Adobe extension configuration
Commerce Unbundled: Extension License: Special license[1]
To create or edit the configuration, decorate the extension under /<light-module>/decorations/magento/ecommerces/magento.yaml.
Licensing
The associated framework is included with your DX Core license and is free of charge. However, this extension is paid and requires an additional special license.
Configuration
If you do not want the connection definition to appear in any of the subapps, set the enabled property (YAML line 3) to false.
Note, that you can write your own implementation (YAML lines 4-14) or decorate /<light-module>/decorations/magento/ecommerces/magento.yaml to suit your requirements, for example, to use additional features such as cross- and up-selling or custom features such as your own checkout solution.
class: info.magnolia.ecommerce.common.EcommerceDefinition
type: Magento
enabled: true
implementation:
  products:
    all: info.magnolia.ecommerce.magento.products.All
    byId: info.magnolia.ecommerce.magento.products.ById
    byCategoryId: info.magnolia.ecommerce.magento.products.ByCategoryId
    searchByText: info.magnolia.ecommerce.magento.products.SearchByText
  categories:
    all: info.magnolia.ecommerce.magento.categories.All
    byId: info.magnolia.ecommerce.magento.categories.ById
    byParentCategoryId: info.magnolia.ecommerce.magento.categories.ByParentCategoryId
    byProductId: info.magnolia.ecommerce.magento.categories.ByProductId
  connectionValidator: info.magnolia.ecommerce.magento.common.MagentoConnectionValidator
connections:
  connectionName:
    authUrl: http://demo.magento.com
    baseUrl: http://demo.magento.com
    enabled: false
    credentials:
      username: your_username
      password: password_or_path_to_password_manager
Using an Integration access
-
Request your Integration Access Token from Adobe Commerce as described in the Adobe Commerce (formerly Magento) documentation.
-
Copy the Access Token provided by Adobe Commerce.
-
Configure your connection as follows using your newly-acquired
accessToken:connections: connectionName: authUrl: http://demo.magento.com baseUrl: http://demo.magento.com enabled: true parameters: accessToken: <your-magento-access-token>Property Description classrequired
info.magnolia.ecommerce.common.EcommerceDefinitiontyperequired
Your e-commerce solution:
magentoenabledrequired
trueorfalseconnectionsconnectionNameauthUrlrequired
Authentication URL.
baseUrlrequired
Base URL.
enabledrequired
Shows if the connection is enabled or not:
trueorfalsecredentialsusernamerequired (unless using Access Token)
Username for Adobe Commerce (formerly Magento).
password(unless using Access Token)required
Password for Adobe Commerce (formerly Magento) or the path to the Magnolia password manager where the password is stored.
parametersaccessToken(unless a username and password is used)required
An access token provided by Adobe Commerce (formerly Magento).
Viewing and testing connections
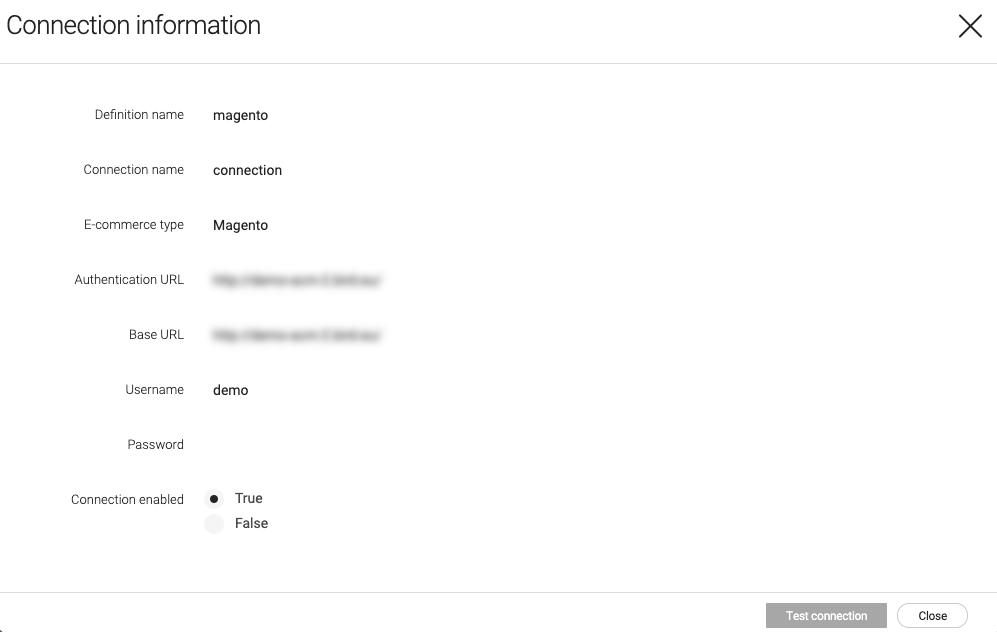
This section explains how to view and test the connection between the Magnolia E-commerce add-on module and your external commerce solution using the E-commerce app.
-
Open the E-commerce app Configuration tab.
-
Select a connection.
-
Click View to see the details of your connection to an external e-commerce solution.

Depending on your external e-commerce solution, the connection information displayed may be:
-
Definition name - The unique definition name. This name appears in the Catalogs subapp.
-
Connection name - The unique name for the connection configured.
-
E-commerce type - The type of external e-commerce solution you are connected to.
-
Authentication URL - Authentication URL for the solution you are connected to.
-
Base URL - Base URL for the solution you are connected to.
-
Username and Password - Credentials to access the external solution. Passwords or client secrets can be managed in the Passwords app.
-
Connection enabled - Shows if the connection is enabled or not. You may choose to disable the configuration, for example, to improve performance times or to test a connection in one environment before enabling it in another.
Click Test connection to check the connection configuration is correct. A message appears indicating if the test is successful or not.
Once you’ve tested your connection, go to the E-commerce tab. You can see the connections you have configured listed with the catalogs they contain.
Connection configuration validator
The info.magnolia.ecommerce.common.ConnectionValidator interface and its implementations check if a connection configuration is valid.
The connection validation check is executed when you click Test connection.
If the connectionValidator property is not configured, the default info.magnolia.ecommerce.common.DefaultConnectionValidator implementation is used. The default connection validator fallback only checks if the categories are returned by the service. This could give a false negative in some cases where the connection works but no categories exist.
|
The implementations of info.magnolia.ecommerce.common.ConnectionValidator are configured under: <module-name>/ecommerces/<definition-name>.yaml:
-
Default implementation:
info.magnolia.ecommerce.common.DefaultConnectionValidatorEvaluates the connection configuration as valid if it returns a non-empty list of categories.
-
commercetools:
info.magnolia.ecommerce.commercetools.common.CommercetoolsConnectionValidatorEvaluates the connection configuration as valid if no exceptions are thrown when getting the project.
-
Adobe Commerce (formerly Magento):
info.magnolia.ecommerce.magento.common.MagentoConnectionValidatorEvaluates the connection configuration as valid when a not empty token is returned.
-
Salesforce:
info.magnolia.ecommerce.salesforce.common.SalesforceConnectionValidatorEvaluates the connection configuration as valid when getting catalogs does not throw an exception when connection parameter
siteIdequals no-site. In other cases, a site with a configured `siteId must be returned. -
SAP commerce:
info.magnolia.ecommerce.sap.common.SapConnectionValidatorEvaluates the connection configuration as valid when the returned list of
BaseSitescontains the configured connection name.
For example, this is a snippet of the connection configuration and implementation with the connectionValidator set to the Commercetools implementation:
class: info.magnolia.ecommerce.common.EcommerceDefinition
type: commercetools
enabled: true
implementation:
  products:
    all: info.magnolia.ecommerce.commercetools.products.All
    byId: info.magnolia.ecommerce.commercetools.products.ById
    byCategoryId: info.magnolia.ecommerce.commercetools.products.ByCategoryId
    searchByText: info.magnolia.ecommerce.commercetools.products.SearchByText
  categories:
    all: info.magnolia.ecommerce.commercetools.categories.All
    byId: info.magnolia.ecommerce.commercetools.categories.ById
    byParentCategoryId: info.magnolia.ecommerce.commercetools.categories.ByParentCategoryId
    byProductId: info.magnolia.ecommerce.commercetools.categories.ByProductId
  connectionValidator: info.magnolia.ecommerce.commercetools.common.CommercetoolsConnectionValidator
Configuring the cache
By default, the content pulled from your external e-commerce solution is updated every 300 seconds (5 minutes). You can configure the cache setting via YAML:
cachingDefinition:
  enabled: true
  invalidateInSeconds: 300
Configuring the images displayed in the E-commerce app
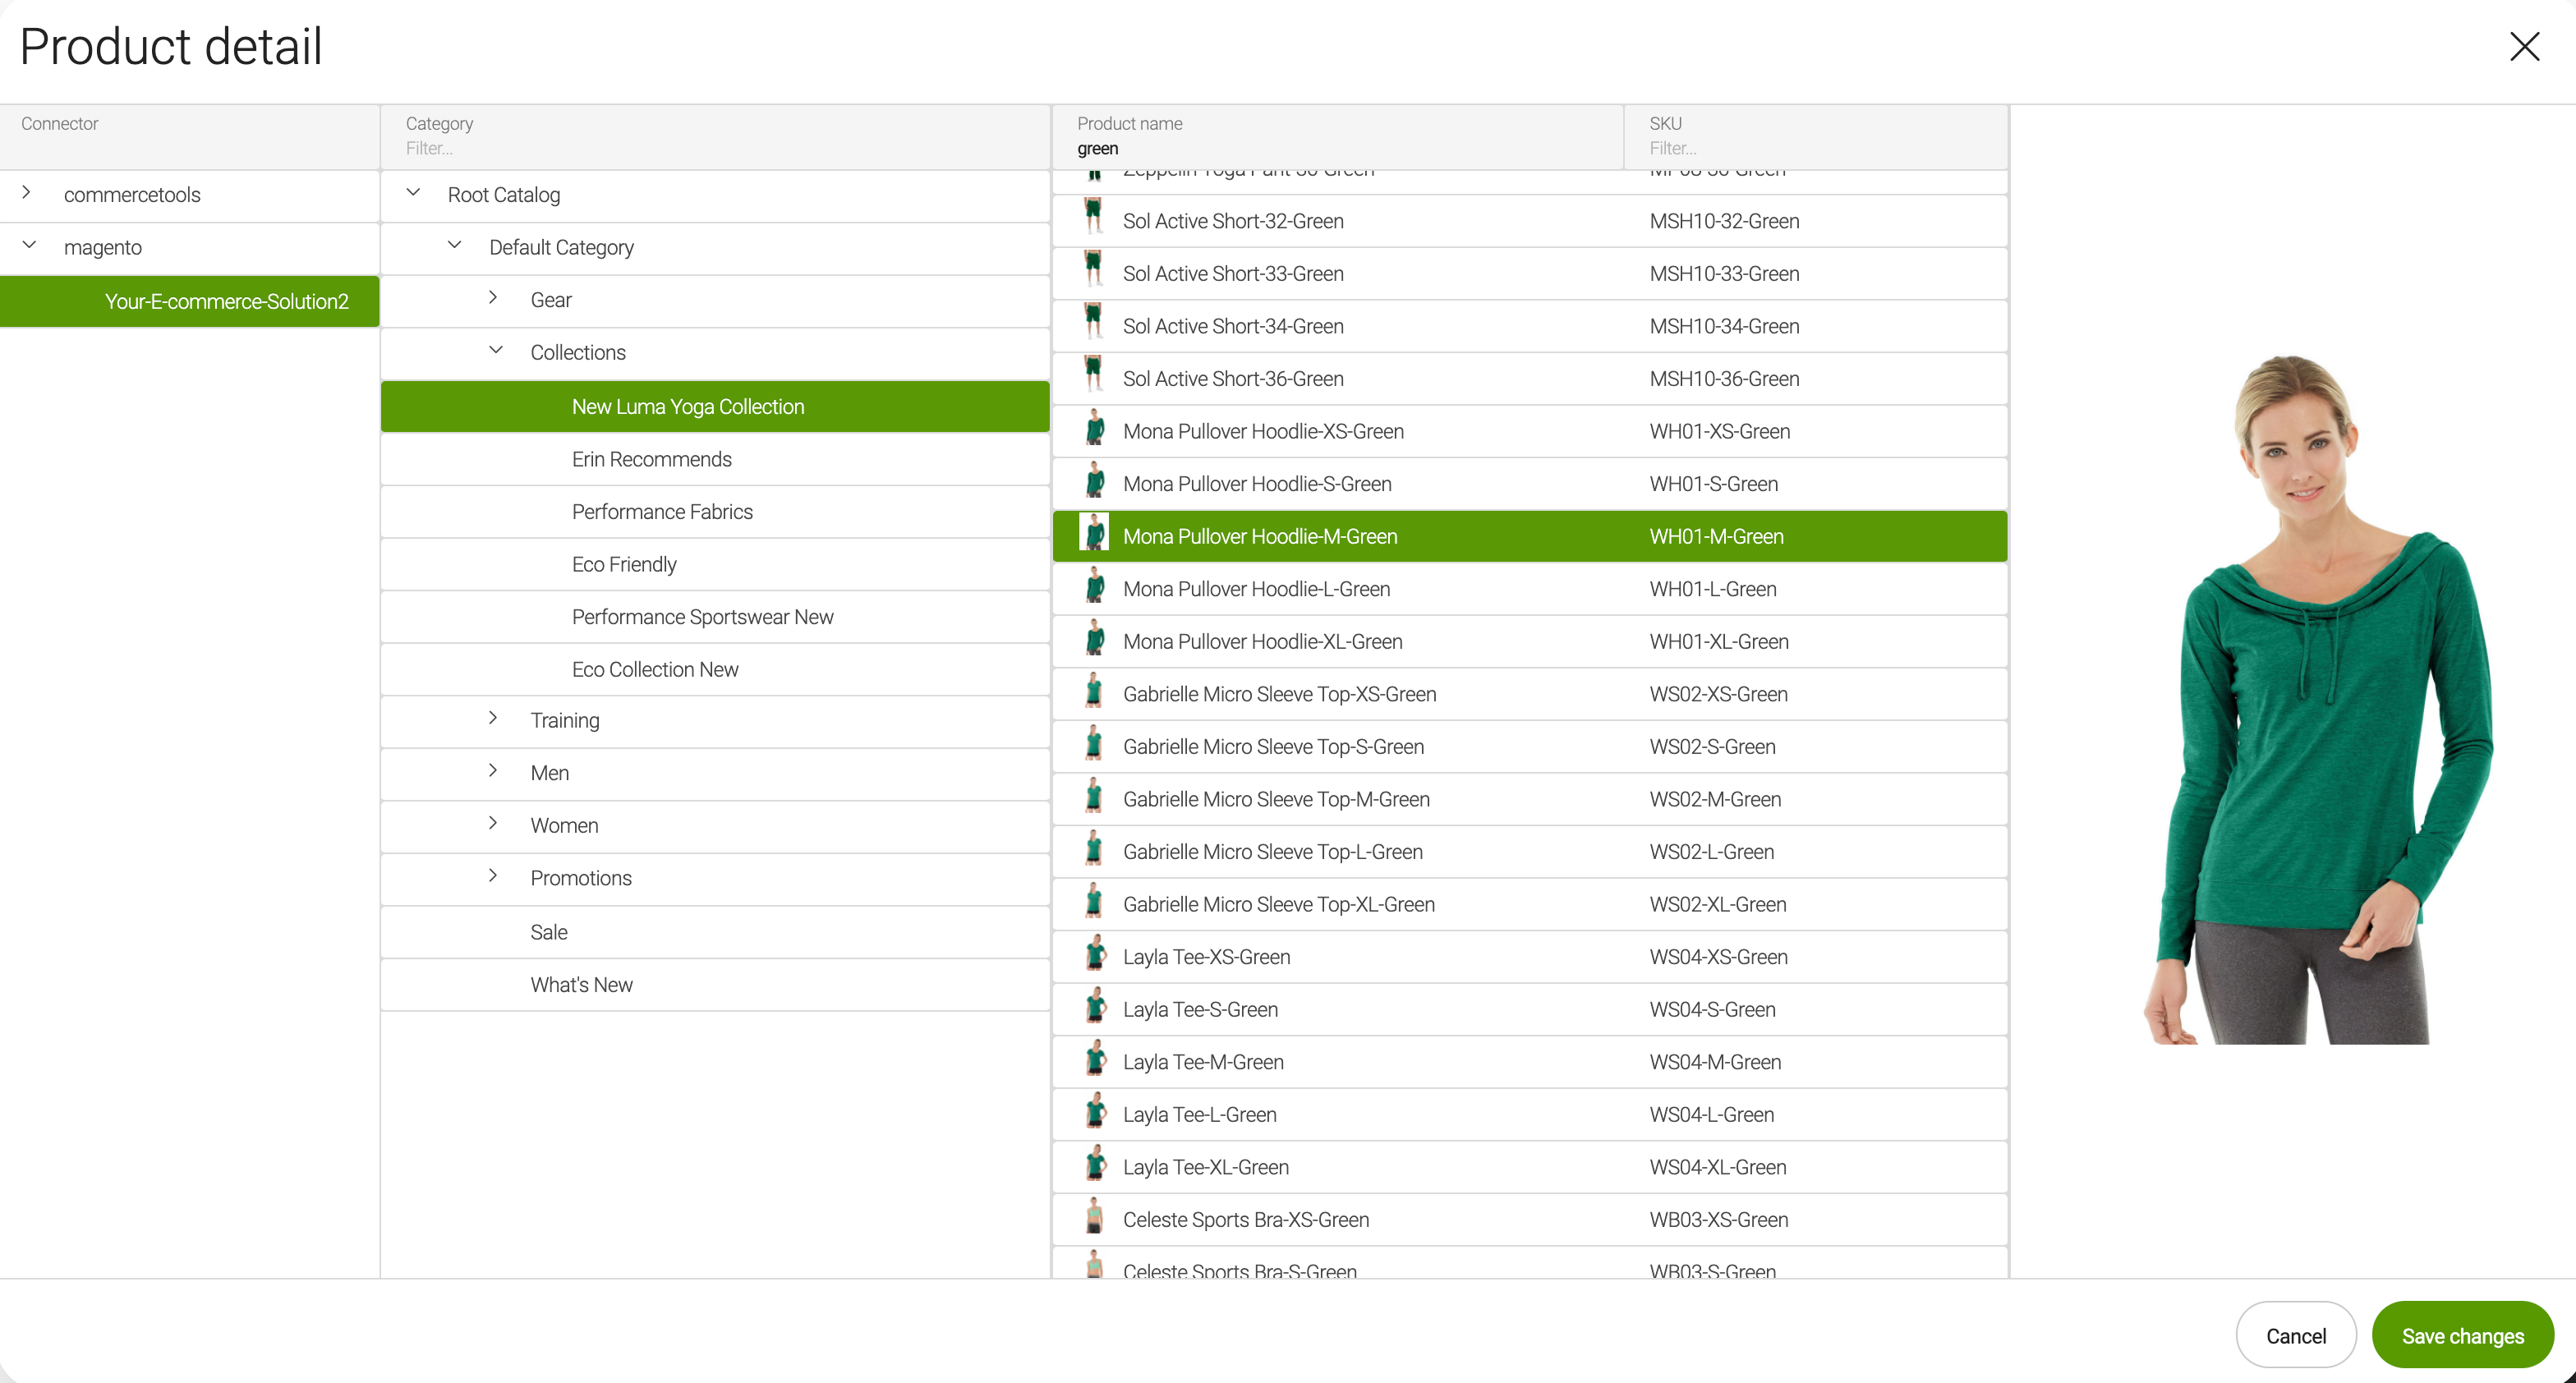
Images stored in your third-party e-commerce solution are displayed in the product detail view of the app.
You can configure:
-
If a single image or multiple images are displayed
-
The size of image(s) displayed.
For example:
    form:
      properties:
        images:
          label: Product image(s)
          $type: multipleImageField
          converterClass: info.magnolia.ecommerce.app.productdetail.field.URLsToStrings
imageRatio: 60| Property | Description |
|---|---|
|
required |
|
optional Field label displayed to editors. The value can be literal or a key of a message bundle. If you do not provide the property, Magnolia will fall back to a generated i18n key. If you do not want a label at all, define the property and set its value to a blank space such as |
|
required Field type:
|
|
required
|
|
optional Defines the ratio of displayed images to the original images in percentage. In the example above, the value If the property isn’t set, the images are displayed in their original size. |
Configuring chooser dialogs (v1.3+)
You can configure the component definition chooser dialogs introduced in v1.3.
You can find the component configuration under /ecommerce-templating/dialogs/components. There is also a section on chooser dialogs on the Category & Product use cases page.
The components introduced in v1.3 are suffixed with -v3. Those with no suffix are provided for backwards compatibility with E-commerce v1.2.x.
|

By default, the chooser dialogs have four columns: connector, category, product and preview.
The Connector column is displayed when you have more than one connector correctly configured and enabled.
If you only have one connection enabled or correctly configured with a definitionName and connectionName in /<my-connector>/ecommerces/<my-connector>.yaml then the Connector column is disabled by default, unless you set enableCategorySelection to false.
The Category and Product columns are displayed by default. You can disable them using the enableCategorySelection and enableProductSelection properties under /ecommerce-templating/dialogs/components/<any-v3-component>.yaml.
By default, the system remembers the last selected item in a given chooser dialog. You can use the rememberLastSelectedLocation property to change this.
| Property | Description | ||
|---|---|---|---|
|
You can use this as a shortcut for Example class annotation
See Field types for general values and the ecommercechooser directory for specific e-commerce field types (some examples are given at the end of this section). |
||
|
optional, default is `true` Set to The product column depends on the category column, so if |
||
|
optional, default is `true` Set to |
||
|
optional, default is `true` When set to When set to
When the Pages app is closed, all remembered locations are removed. |
Configuring text classification and image recognition for e-commerce content
If you have configured them, both Image Recognition and Text Classification are enabled for your e-commerce content.
To trigger the tagging operation, select a product and click Tag product in the E-commerce app action bar. You can view the tags generated in the ecommerce workspace in JCR Browser app (system properties view) or in the Tags app. You can search for products based on the tags in the Find Bar.
Default configuration:
imageRecogniserEnabled: true
textClassifierEnabled: true
autoRecognitionEnabled: false| Property | Description | ||
|---|---|---|---|
|
required, default is Enables image recognition functionality for e-commerce content. Disable this functionality by setting the property to |
||
|
required, default is Enables text classification functionality for e-commerce content. Disable this functionality by setting the property to |
||
|
required, default is Enables automatic tagging. You can enable automatic tagging by setting the autoRecognitionEnabled property to
|
Configuring timeout
You can configure connectionTimeoutInSeconds (the time needed to connect to the e-commerce solution) and readTimeoutInSeconds (the time needed to read and show the data you selected).
The default value for connectionTimeoutInSeconds is 10 while the default value for readTimeoutInSeconds is 30.
These values can be customized in the Resource Files app.
Find the connector you want to modify, open the folder, and choose the config.yaml file:
connectionTimeoutInSeconds: 30
readTimeoutInSeconds: 10
Replacing the value with lower than 1 results in error in commercetools, and infinite timeouts in other available connectors.
|
In commercetools you can set only the connectionTimeoutInSeconds. Adobe Commerce (formerly Magento), Salesforce Commerce Cloud, and SAP Commerce Cloud (formerly Hybris) support both connectionTimeoutInSeconds and readTimeoutInSeconds.
|