Use packages
This page explains how to use packages, including checking for them, uploading, downloading, and importing them.
|
When installing any package that overwrites or restructures existing content, schedule a maintenance window for the affected paths. During this window, team members must not edit, publish, move, delete, or run bulk operations on the impacted content. Use a system-wide notification to inform all affected users before and during the window. |
Check packages
You can check whether a particular product launch or quarterly results package is created. The list of packages is sorted by creation date by default. Once you’ve found the package you’re looking for, you can look inside to check if all the content is included within the package.

Download packages
You can download a package to create a backup or transfer it to another environment. A package’s contents must be built before you can download it.
-
Open the Package Manager app.
-
Select a package.
-
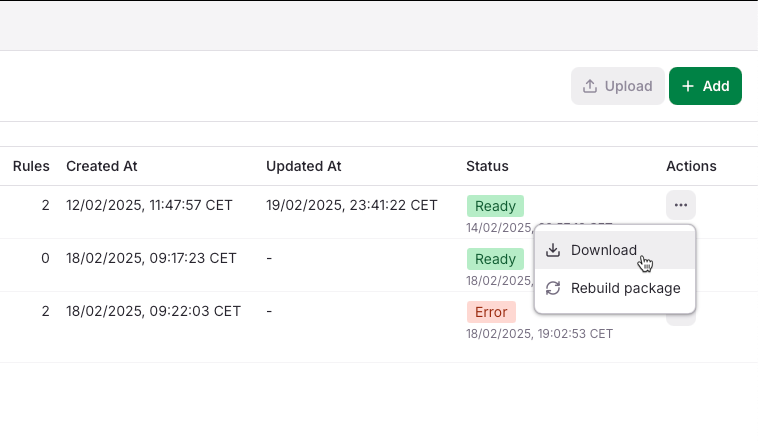
Click the Download icon in the Actions column of the browser view or use the three-dot of the edit package view.
-
The package is downloaded, and you can upload it on another instance.
Upload packages
Packages are created as .zip files.
To upload a package, its contents must be built and the package name must be unique.
-
Open the Package Manager app.
-
Click Upload.
-
Select the package .zip file you want to upload and click Open.
-
The package is imported, and you can follow its progress on the progress bar. Additionally, you can pause and resume the upload as needed by clicking the respective buttons above the bar.

Install packages
When you install a package, its content is applied to the instance where it was uploaded, based on the chosen installation mode. You can’t stop or revert package installations once they are running. Therefore, it is crucial to thoroughly test package installations on a test instance before deploying them to live instances.
-
Open the Package Manager app.
-
Select a package.
-
From the three-dot menu, click Install.
-
Choose a content merge rule. Any filters defined for content exclusion during package creation are also applied during installation, thereby protecting any existing content on the instance with the same exclusion path.
-
Replace: Content from the package replaces any content found in the same path on the current instance. Use this option if you want to replace any content on the current instance with the content present in the package. This means that existing content is overridden or deleted as necessary. -
Merge: This option installs content from the package only to paths that don’t already exist on the current instance. It’s ideal for incorporating new package content while safeguarding existing content on the instance. -
Update: Existing content on the current instance is updated with package content, and new package content is added. Any existing content on the server not included in the package remains untouched.When installing content, the order of content on the target instance may differ from the order on the source instance. Be careful when choosing the installation mode if the target already contains content created by a different import mechanism (for example, Magnolia’s Export/Import, not Package Manager). Those nodes may have UUIDs different from those in your package. Using MergeorUpdatein such cases can lead to node collisions (for example, “node exists with a different UUID”). For an initial install to a target that already has content at the same paths, preferReplace, or delete the existing subtree before installing the package. Avoid mixing import mechanisms for the same paths.
-
-
Confirm by pressing Install.
-
Installed: If content is installed successfully without errors, the package’s status changes toInstalled.Once content has been successfully installed on an instance, it’s immediately accessible for subsequent modifications.
Synchronicity between the author and public instances is only guaranteed in DX Core publishing. Package Manager skips the publishing workflow completely and unzips content on an instance instead.
If you need to remove live content directly, delete it from the respective workspace. For example, to delete content installed in the website workspace, use the Pages app. Deleting content on a public instance won’t work if workflows aren’t enabled in the Pages app. -
Content is installed. Errors occurred during the process: In the event of errors, you can view the log.If errors occur, content may be partially installed on the instance. -
Install failed: Your package content isn’t installed on the instance.
-
-
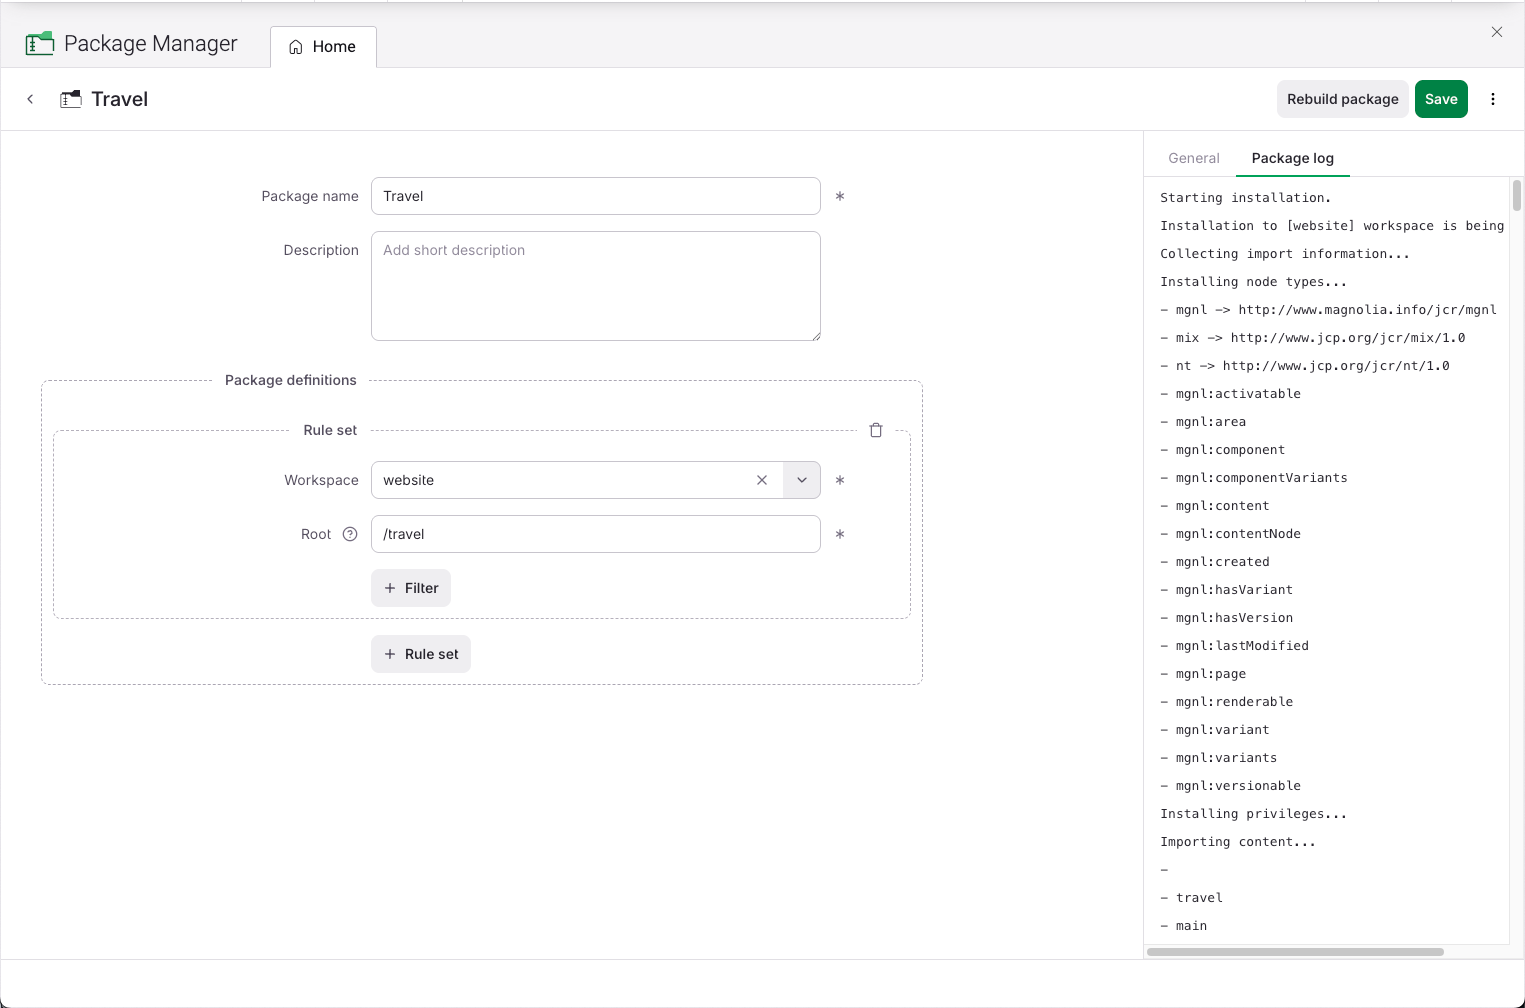
Inspect the log. You can find an installation log on a package’s edit view after installing a package. It displays log messages related to the actions performed. For each node in the package, the log shows whether it was added (
A), updated (U), left untouched (-), and when an error occurred (E).