Uploading assets
You can upload assets individually or in bulk, import them as a zip file, or upload assets from another app.
Uploading an asset in the Assets app
To upload an asset:
-
Open the Assets app.
-
Select a parent folder to upload the asset. If no folder is selected, the asset uploads at the root level.
-
Click Upload assets in the action bar.
-
In the dialog that opens, select the files you want to upload or drag and drop them into the designated area.
The upload size limit is 100MB, regardless of the number of assets you want to upload. This limit can be changed by your Magnolia administrator.
| By default, you can’t change the filename of an asset once it’s in Magnolia. A field to rename asset filenames can be added by your Magnolia administrator. |
Uploading .zip archives
Uploading and extracting .zip archives allows you to prearrange your file hierarchy in advance and seamlessly upload it to Magnolia while preserving the original structure.
You can upload a .zip archive containing multiple folders and assets:
-
Open the Assets app.
-
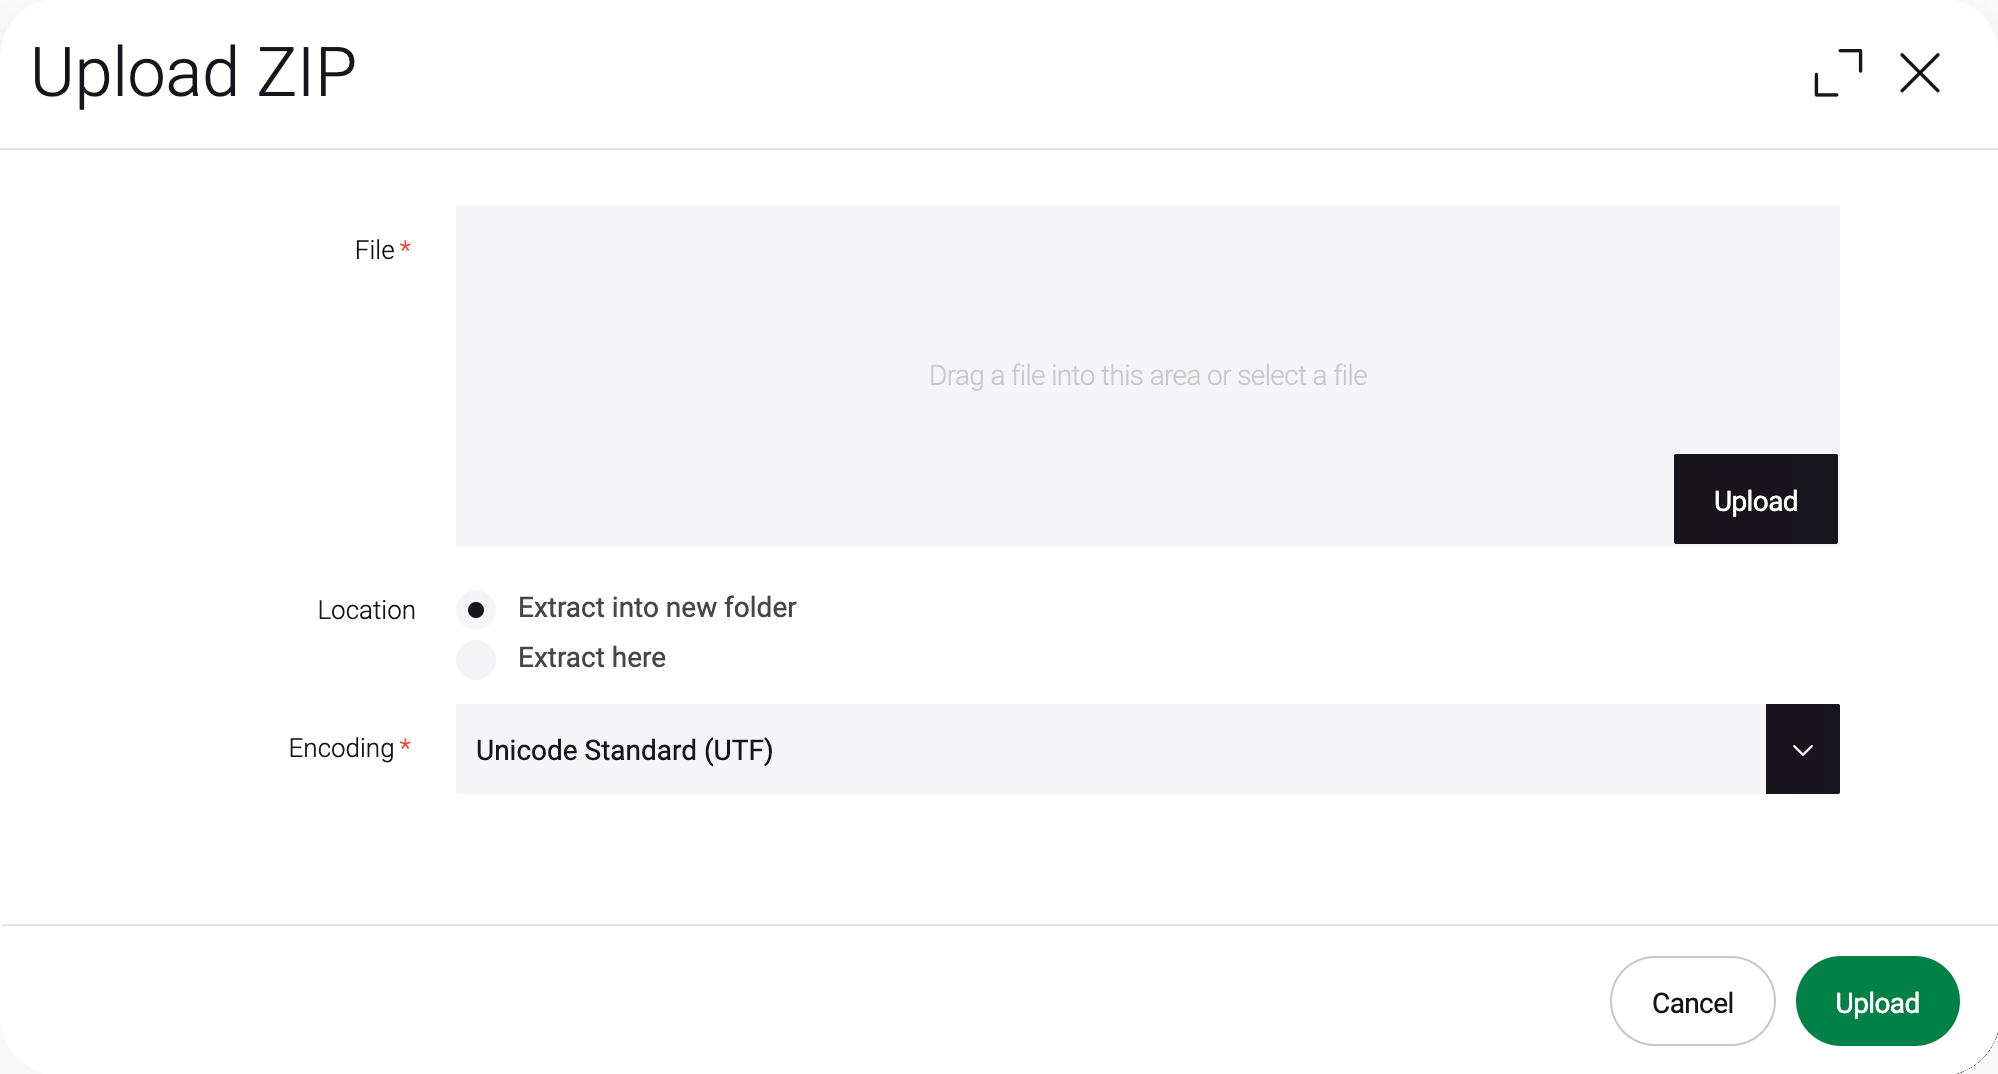
Click Upload ZIP archive in the action bar.
-
Click Upload and select the .zip archive you want to upload, or drag and drop it into the upload area.
-
Select a location. You can choose between:
-
Extract into new folder: Adds a new parent folder to contain the contents of the .zip archive (default).
-
Extract here: Extracts the .zip archive directly into the current folder.
-
-
In Encoding, select the encoding for your zip archive:
-
Unicode Standard (UTF) - If your .zip archive contains filenames with special or international characters to ensure compatibility across different systems.
-
Code Page 437 (CCSID 437) - If your .zip archive was created on an older Windows system or DOS, as it preserves legacy character encoding.
-
Simplified Chinese Characters (GBK) - If your .zip archive includes filenames in Simplified Chinese to correctly display and extract them.
-
-
Click Upload.
Uploading an asset from another app
You can upload an asset into the Magnolia DAM from many other apps, for example, when you add an image in the Stories app. You can define app-specific metadata fields that may be different from the standard metadata fields available when uploading in the Assets app.