Plugins
Plugins are available from version 1.1.1.
Magnolia AI Accelerators plugin system provides a way for developers to add custom logic to AI assisted text fields and AI powered stories generation.
Each plugin section provides:
-
Everyone : An overview of the plugin
-
Developers : How to activate the plugin
-
Authors : A brief look at what the plugin looks like inside Magnolia
Tools definition plugin
Block Tool
To activate the plugin:
-
Go to the
<light-module-folder>/<light-module-name>/aiEditorExtensions/<your-block-tool>.yamlfile in your project. -
Ensure that you have the following in the file:
<light-module-folder>/<light-module-name>/aiEditorExtensions/<your-block-tool>.yamlenabled: true name: ExpandBlockTool toolType: block availableBlocks: ["paragraph"] scriptLocation: /openai-automations/webresources/shared/wysiwyg/block-tools/ExpandBlockTool.js (1)1 References the required script.
import { BlockTool } from "./openai-automations/webresources/shared/wysiwyg/block-tools/BlockTool.js";
export default class ExpandBlockTool extends BlockTool {
aiService = new AIService();
async onExecute(text) {
return await this.aiService.expand(text);
}
get icon() {
return expand;
}
get label() {
return "Expand";
}
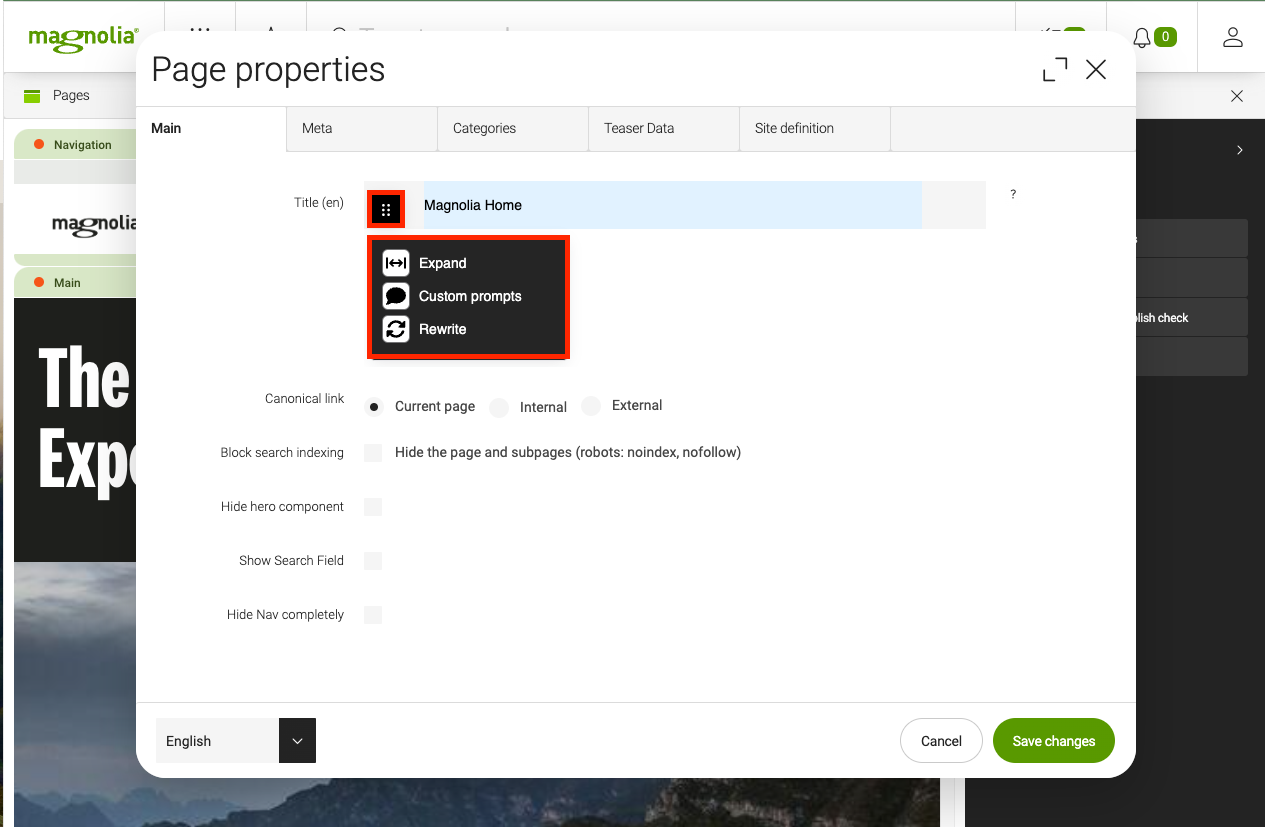
}Once the plugin is activated, you’re able to use it directly in Magnolia as shown here.
Inline Tool
To activate the plugin:
-
Go to the
<light-module-folder>/<light-module-name>/aiEditorExtensions/<your-inline-tool>.yamlfile in your project. -
Ensure that you have the following in the file:
<light-module-folder>/<light-module-name>/aiEditorExtensions/<your-inline-tool>.yamlenabled: true name: ExpandTool toolType: inline availableBlocks: ["paragraph"] scriptLocation: /openai-automations/webresources/shared/wysiwyg/inline-tools/ExpandTool.js (1)1 References the required script.
import {InlineTool} from "./openai-automations/webresources/shared/wysiwyg/inline-tools/InlineTool.js";

export default class ExpandTool extends InlineTool {
  aiService = new AIService();

  // must be static
  static get title() {
    return "Expand";
  }

  get icon() {
    return expand;
  }

  async onExecute(markedText) {
    return await this.aiService.expand(markedText);
  }
}
Once the plugin is activated, you’re able to use it directly in Magnolia as shown here.
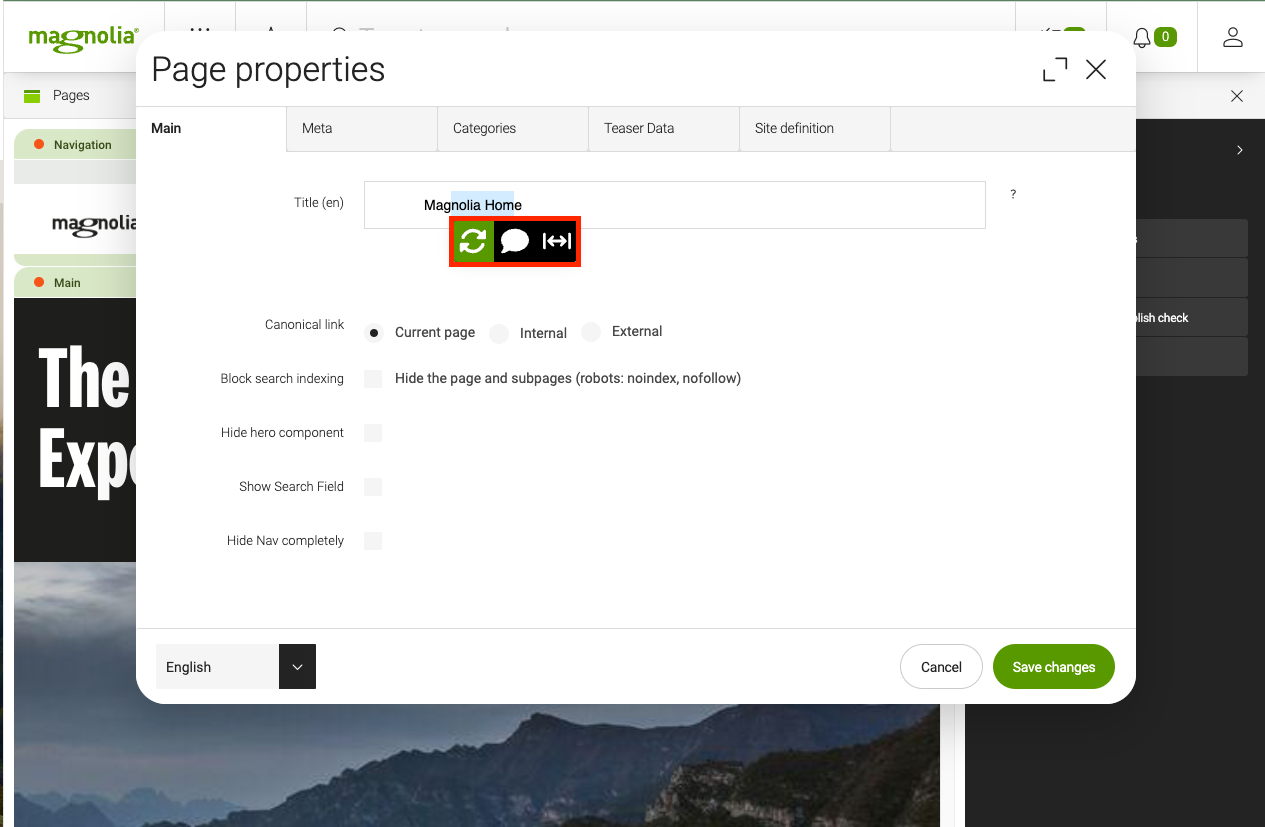
Dialog Plugin
Dialog plugins consist of two separate plugins.
The tool (either inline or block) and the dialog itself.
The tool is used to open the dialog with <Dialog Name> (CustomPromptTool.onExecute) and return text content to the editor.
| The dialog can be used for different purposes such as retrieval augmented generation (RAG). |
To activate the plugin:
-
Go to the
<light-module-folder>/<light-module-name>/aiEditorExtensions/<dialog>.yamlfile in your project. -
Ensure that you have the following in the file:
<light-module-folder>/<light-module-name>/aiEditorExtensions/<dialog>.yamlenabled: true name: <Dialog Name> toolType: dialog (1) scriptLocation: <light-module-folder>/<light-module-name>/webresources/<CustomPromptDialog>.js (2)1 Ensure the toolTypeis set to dialog.2 References the required script.
Here, we provide an example.
-
Define the prompt tool such as inline or block tools.
<light-module-folder>/<light-module-name>/aiEditorExtensions/<dialog-tool>.yamlenabled: true name: CustomPromptTool toolType: inline|block scriptLocation: <light-module-folder>/<light-module-name>/webresources/<CustomPromptTool>.js -
Ensure the script referenced in the dialog tool is correct.
CustomPromptToolexport default class CustomPromptTool extends InlineTool { static get title() { return "Custom prompts"; } get icon() { return bubble; } async onExecute(text) { const actionEvent = await this.config.dialogs.CustomPromptDialog.open(); // Note the dialog name if (actionEvent.cancel) { return text; } else { // Use content provided by dialog and execute prompt } } } -
Ensure the PromptDialog.js is set for the dialog.
/openai-automations/webresources/shared/wysiwyg/modal/PromptDialog.jsimport {html} from "https://cdn.jsdelivr.net/gh/lit/dist@2/all/lit-all.min.js"; import {BaseDialog} from "./openai-automations/webresources/shared/wysiwyg/modal/BaseDialog.js"; export default class CustomPromptDialog extends BaseDialog { constructor() { super(); } onConfirmDialog() { // retrieve content from external system to embed into prompt return api.getData(); } get title() { return "Custom prompts"; } get label() { return "Executed complex custom prompts on current context"; } open() { // Execute custom logic on dialog open return super.open(); } renderDialog() { // Render Custom Dialog web component with jsx return html`<div>Render your custom dialog contents here</div>`; } }
Once activated, you can see the dialog directly in Magnolia.