CDN settings
Content Delivery Network (CDN) settings play a crucial role in optimizing website performance and enhancing user experience during deployment. You want to ensure that only legitimate visitors are able to gain access to certain areas of your site including administrative or internal areas of your site. It’s important to provide an optimal experience for site visitors during peak times and keep the site up and running. The features shown here in CDN settings help to cover you on both fronts.
Access control
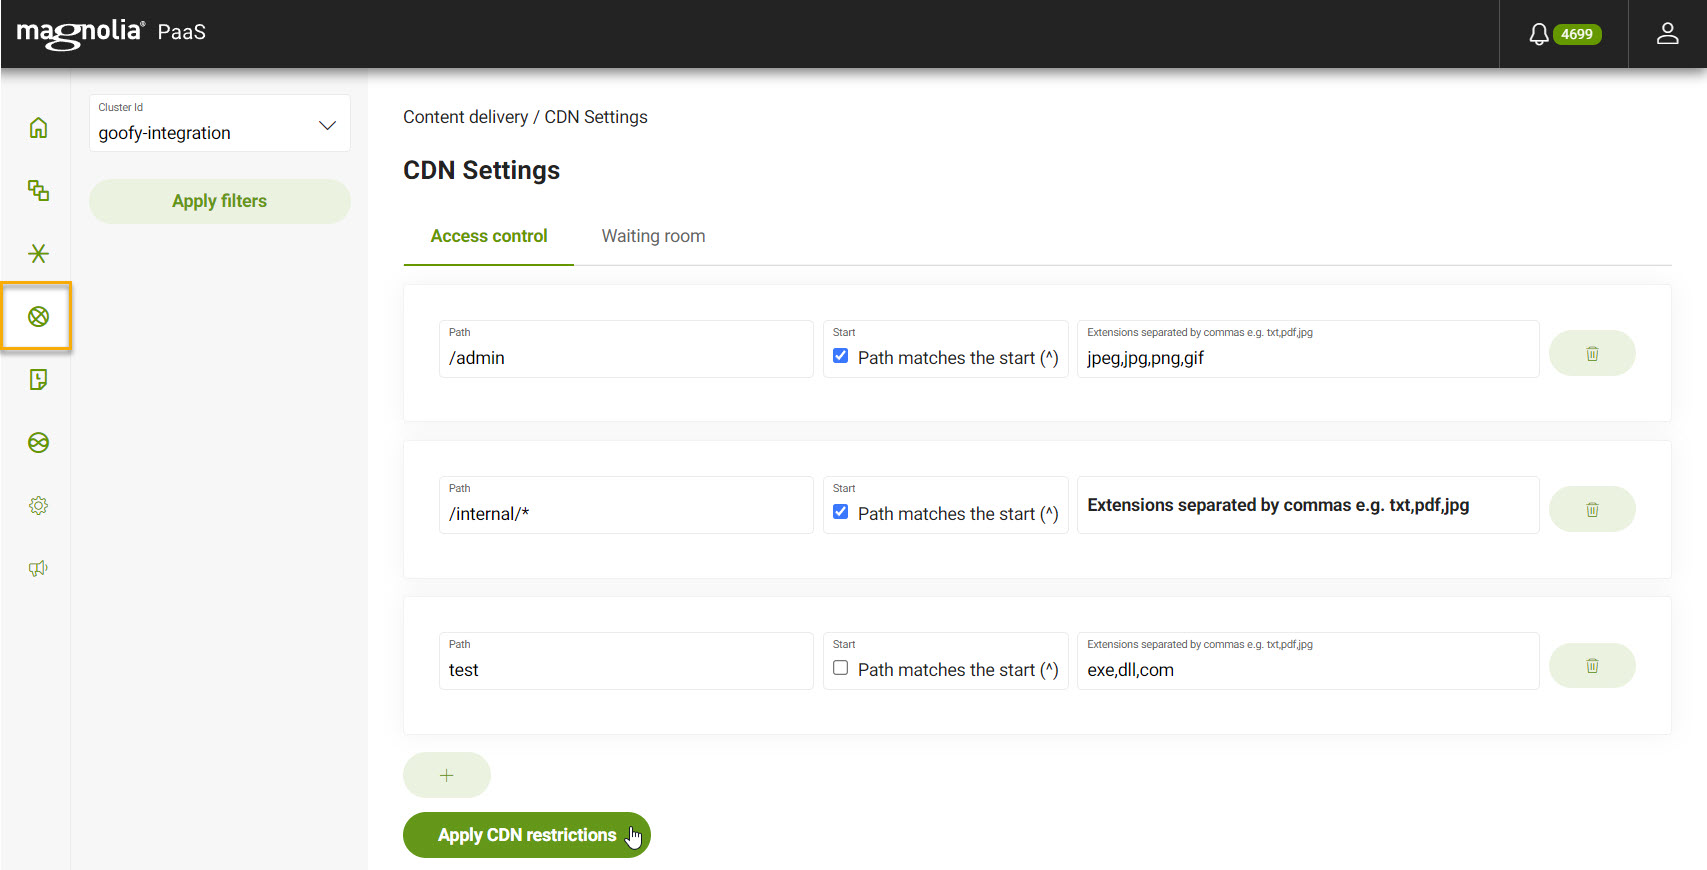
With Access control in DX Cloud PaaS, you’re able to configure rules that prohibit access to certain paths and extensions. This prevents any unintended visits to pages that should be internal or files that should be kept for certain groups or individuals.
Apply CDN restrictions
View from the Cockpit
-
Go to Content delivery > CDN Settings.
-
Go to Access control.
-
Choose the Cluster Id from the dropdown.
-
Click Apply Filters.
-
Click the to create a new restriction.
-
Enter the Path that you want to protect.
example/internal/* (1)1 This would protect all areas of the site under internal. -
If desired, enable Path matches the start (^). This ensures that the match occurs only if the URL path starts with the specified pattern.
-
If desired, add any extensions that you explicitly want to protect under this path. The extensions should be separated by commas.
examplepdf,txt,jpg,png
-
-
Click Apply CDN restrictions.
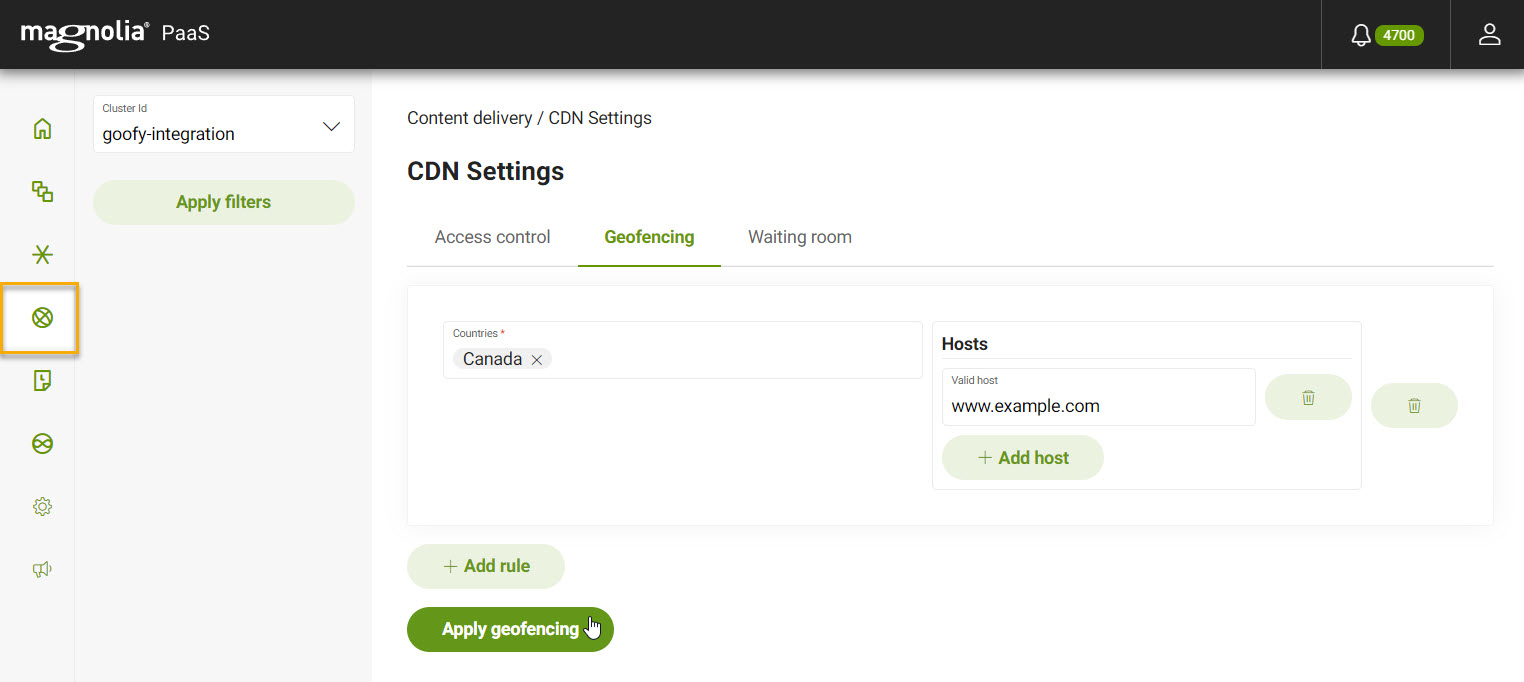
Geofencing
DX Cloud PaaS’s geofencing lets you control access to your site content based on a user’s geographic location. This allows you to define country boundaries around your site’s access. The feature ensures you’re able to comply with regional regulations, enforce licensing restrictions, or tailor content based on geographic targeting.
Error responses
You can customise error responses directly from the Cockpit with DX Cloud PaaS.
This ensures that when users get a 404 or 503 error, they’ll receive your custom message.
Set custom error page response
View from the Cockpit

-
Go to Content delivery > CDN Settings.
-
Go to Responses.
-
Choose the Cluster Id from the dropdown.
-
Click Apply Filters.
-
Toggle on the desired error page.
-
Enter your custom message inside the
htmlelement.We recommend keeping the messagse concise. There is a maximum 3MB limit for the Fastly configuration which includes these pages and other objects. -
Click Apply changes.
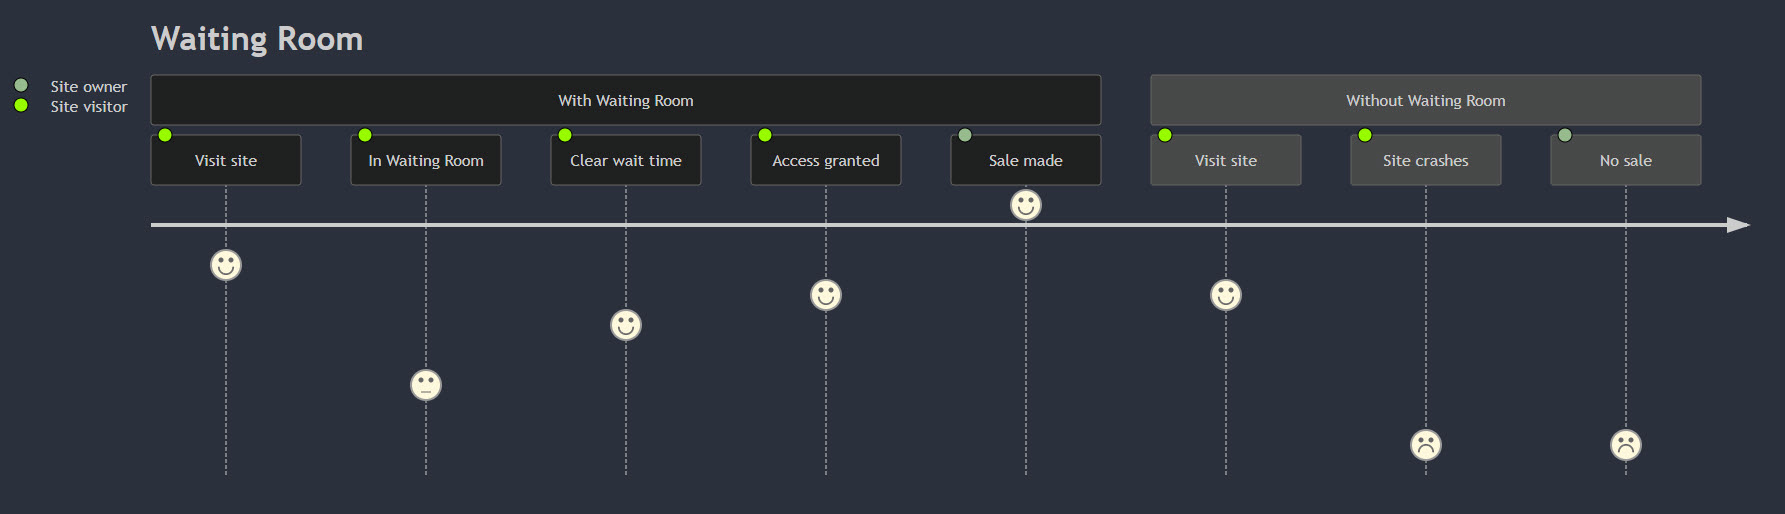
Fastly Waiting Room
Premium feature
The Fastly Waiting Room is a feature to help you manage high traffic volume on your site and prevent site overload. It assigns a delay for new user requests which allows existing users to finish what they’re trying to do.
The Fastly Waiting Room:
-
Prevents site overload by intelligently handling the influx of new visitors.
-
Fairly distributes the site traffic so that each user has equal chance of access. During high-demand events, promotions, or sales, this can be highly useful.
-
Reduces server load so performance is not hindered.
Get the Fastly Waiting Room
The Fastly Waiting Room is a premium feature. You’ll need to talk with your DX Cloud PaaS representative to discuss enabling the feature.
You must have the appropriate admin privileges to enable the Fastly Waiting Room. If you go to the Waiting Room in the Cockpit without the appropriate privileges, you’ll see an error page. If your account has the privileges to enable the Fastly Waiting Room, you can follow the instructions here.
Configure the Fastly Waiting Room
-
In your Cockpit, go to Content delivery > CDN Settings.
View from the Cockpit
-
Go to Waiting room.
-
Choose the Cluster Id from the dropdown.
-
Click Apply Filters.
-
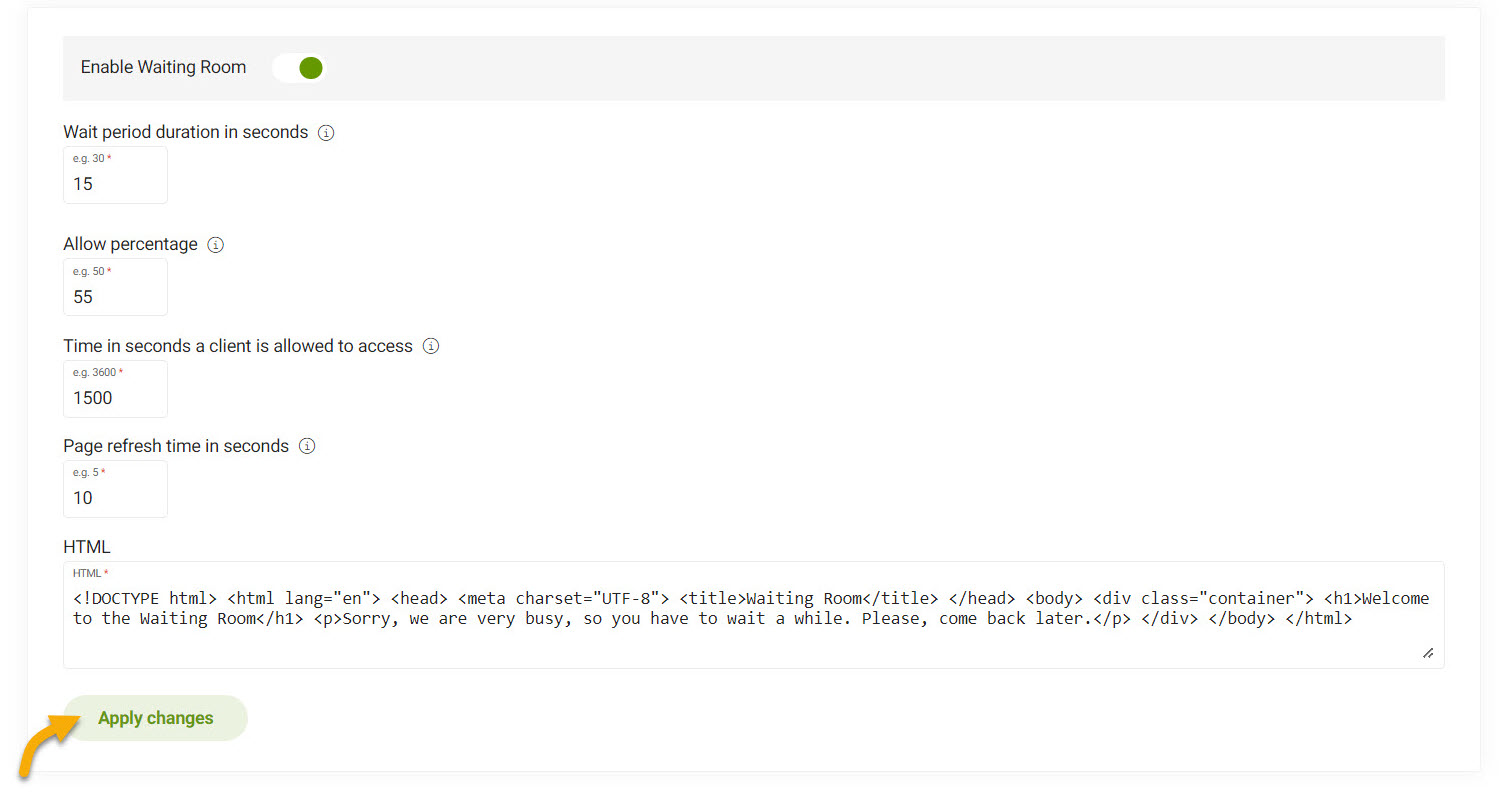
Toggle Enable Waiting Room to enable the feature.
-
Input the Wait period duration in seconds.
This is the minimum period of time a visitor must wait before a decision to grant access is made.
-
Input the Allow percentage. Enter a value between
0and100.Important considerations
-
Input the Time in seconds a client is allowed to access.
This is how long the site visitor can stay on the site after access is granted.
Default is
3600seconds (60 minutes/1 hour) -
Input Page refresh time in seconds.
This is how long the Waiting Room waits to refresh and check for cookie status. Default is
5seconds -
Input the HTML that is used to render the look and feel of the Waiting Room.
Sample and tips