Uploading assets
You can upload assets individually or in bulk in the Assets app, or upload them from another app.
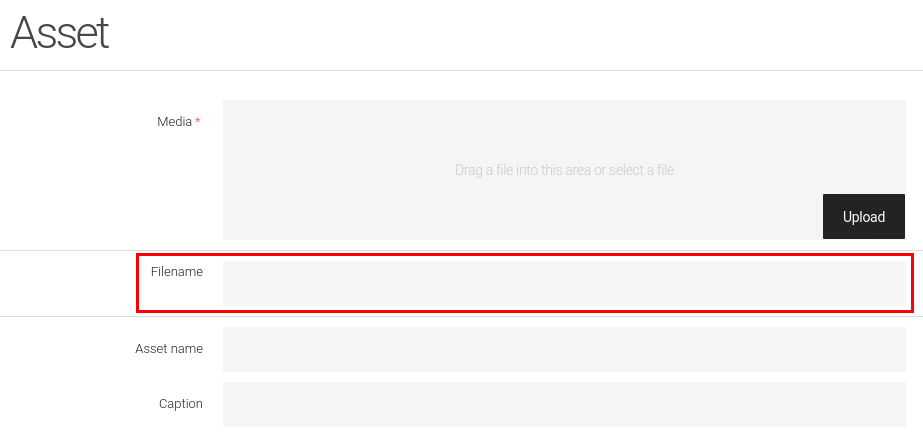
To upload an asset in the Assets app:
-
Select a parent folder to upload the asset. If no folder is selected, the asset will upload at the root level.
-
Click Upload assets in the action bar.
-
Select files to upload or drag and drop them into the designated area.
-
Click Upload.
-
Wait for the notification confirming a successful upload.
|
The upload size limit is 100MB, regardless of the number of assets you want to upload. To change the limit, see Configuring asset upload. |
|
If one or more of the files you’re trying to upload is corrupted, a notification will inform you of it. Those files are ignored from the uploading process although they appear on the upload list. |
|
In the default configuration, the dialog does not have a field for renaming the filename of the asset.
To read more on how to add the field to the dialog head over to assets configuration. |
Uploading an asset from a different app
You can upload an asset into the Magnolia DAM from any other app that can browse the DAM, for example when creating a new contact in the Contacts app. Click on Upload and select the image you want to add to your contact.
You can further define app-specific metadata fields which can be different from the standard metadata fields available when uploading in the Assets app.