A/B/n Testing app
This page explains how to set up and run an A/B/n test from your Magnolia instance.
To start and run an A/B/n test in Magnolia, you must have installed the A/B/n Testing module as well as the Analytics module.
Creating a new test
When you create a new test, you are guided through the process in the app. Each step has a dedicated tab where you:
-
Set up the test
-
Define goals
-
Create variants
-
Select audience and allocate traffic
-
View test results
Once you have created and started your test, the app shows you where you are in the process and how much time is remaining to get significant results. The run time estimate typically takes the estimated traffic on the site into account.
At any point during the creation of the test, you can save it and carry on later. You can always see the test status in the A/B/n Testing app.
| You can quickly create tests based on previous tests using the Duplicate test action. Note that the original page is not set in the duplicated test if it has since changed and the variants of the test are only duplicated if the source test is complete. |
Basic setup
| Before you start the test or create a variant, make sure the original page is published. |
To set up a new test:
-
In the A/B/n Testing app, click Create new test.
-
In the Setup tab, enter a Name and Description for your test.
-
Select the Original page on which the test is based.
-
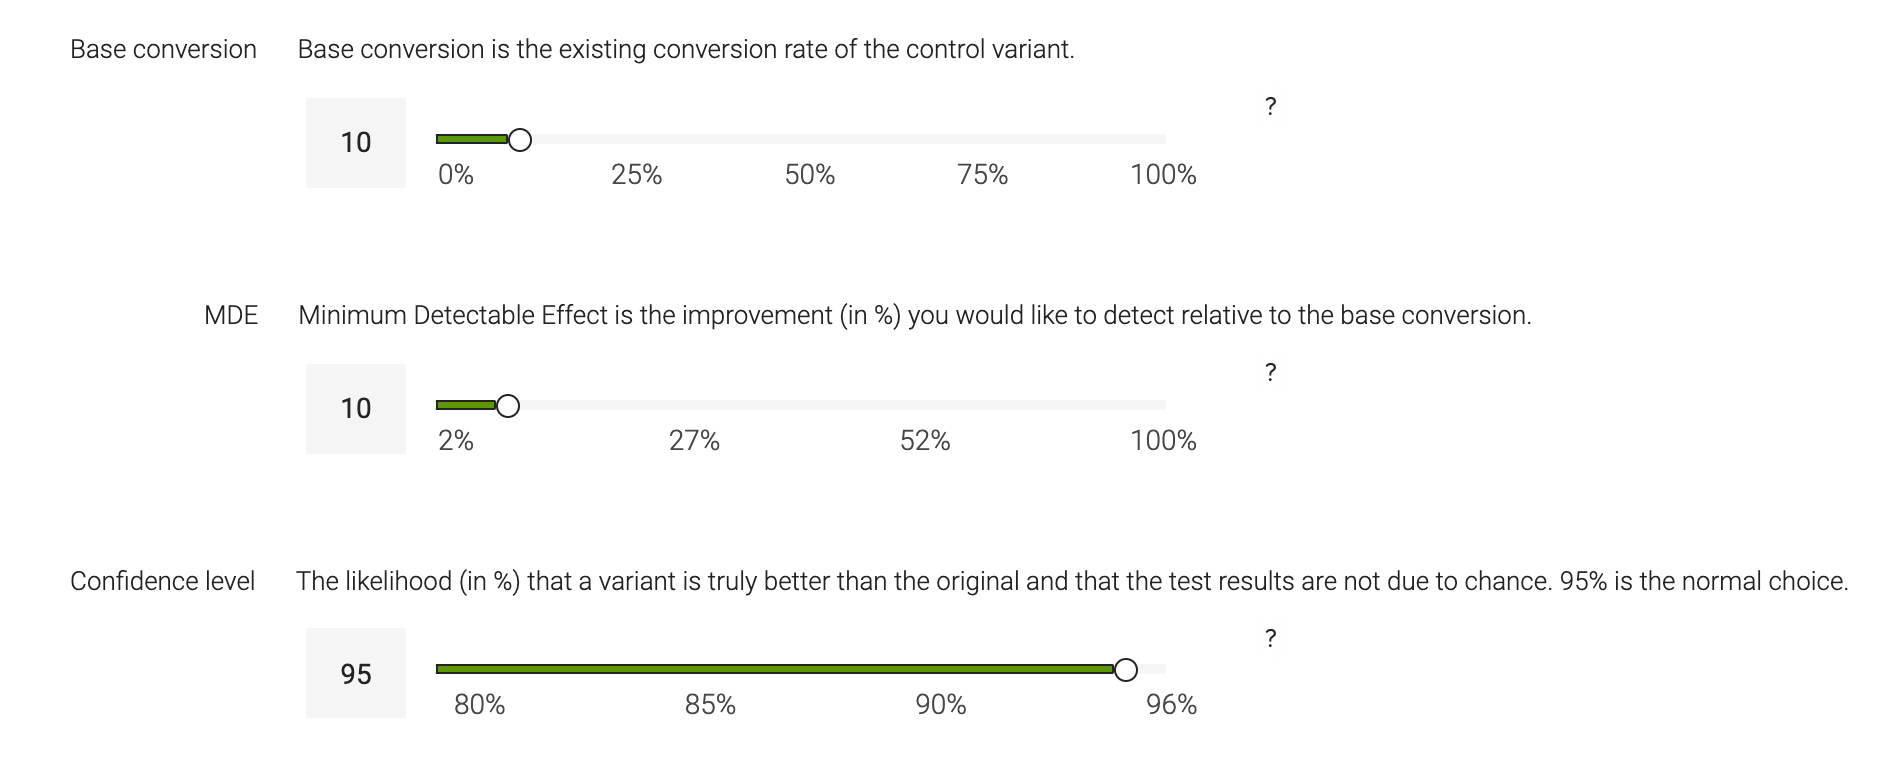
Use the sliders to choose the:
-
Base conversion
-
MDE
-
Confidence level
-
| When an original page is being used in a test, the status of the test in displayed in the Pages app. If necessary, you can continue working on the original page while the test is running. When the test completes and you must decide which variant to use, Magnolia informs you if the original has changed since the test began. |
| Use your left and right arrow keys to move the sliders. |
Once you have completed the basic setup, go to the next tab, Goals tab, to enter a name for your goal.
Goals
Enter a name for your goal.
| The only event type currently available is Click-through rate (CTR). |
Once you have given a name to your goal, you can move on to the next tab to create the variants to be tested against the original page variant and select the click targets.
Variants
To select and define the different variants and click targets involved in your test or to add a new variant:
-
Click the Variants tab.
-
In the Variants tab, click Add variant.
-
Provide a brief description and Save your variant.
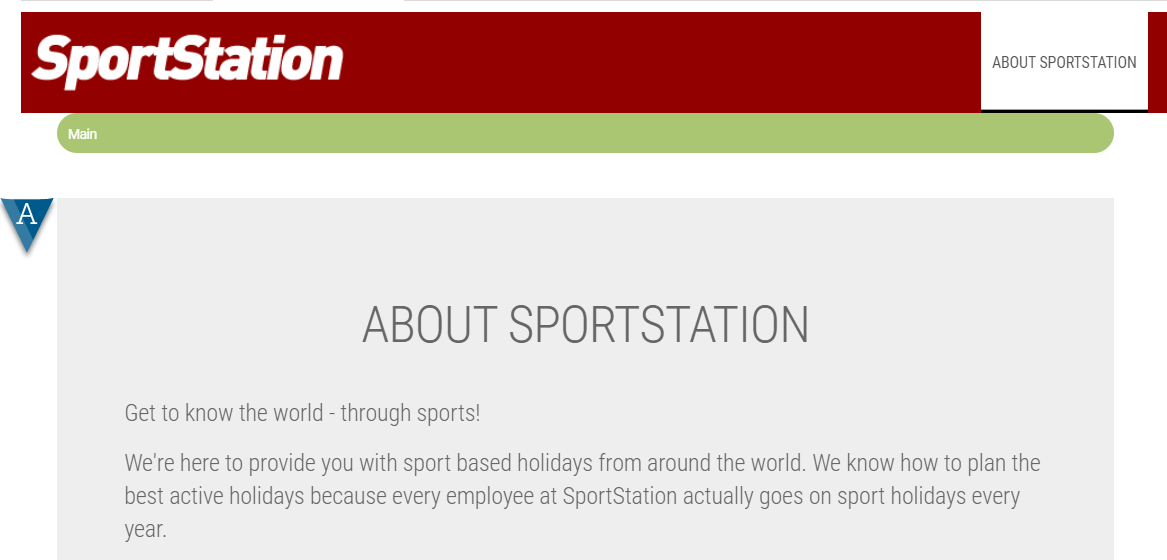
When you create your first variant, it is named variant B. The original page selected is named as variant A. Both are listed in the variants tab.
Variant names are generated by the system and cannot be changed. Only the description can be edited. The system-generated names are used by the testing algorithm as conversion values when calculating the winning variant. We recommend you create no more than 5 variants in one test.
-
Select your newly-created variant and click Edit variant.
-
Edit your variant as required.
-
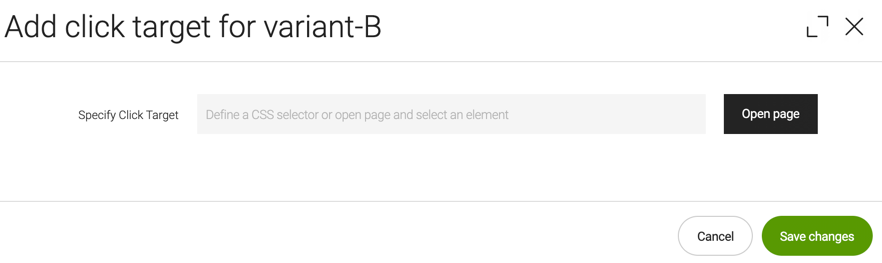
Select your variant again and click Add Click target.
-
Use the Open page button to select a click target on a page.
-
Choose your click target and confirm your selection.
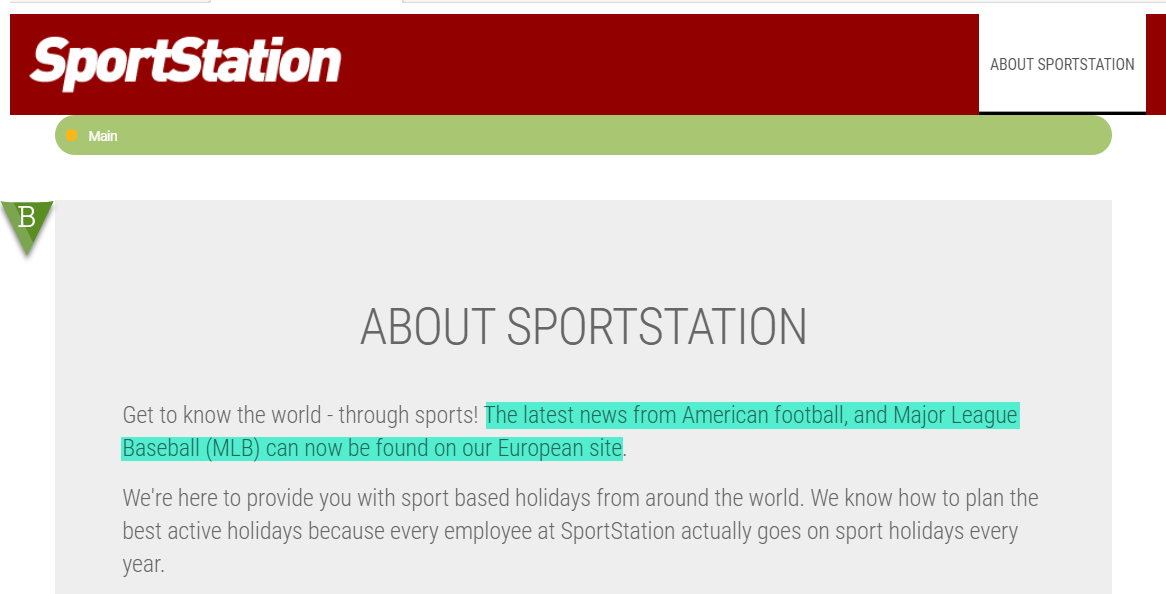
In this example, an additional sentence has been added to variant B compared to the original variant A:
Once you have created your variants and selected the click targets, move on to the Audience & Allocation tab.
Audience and allocation
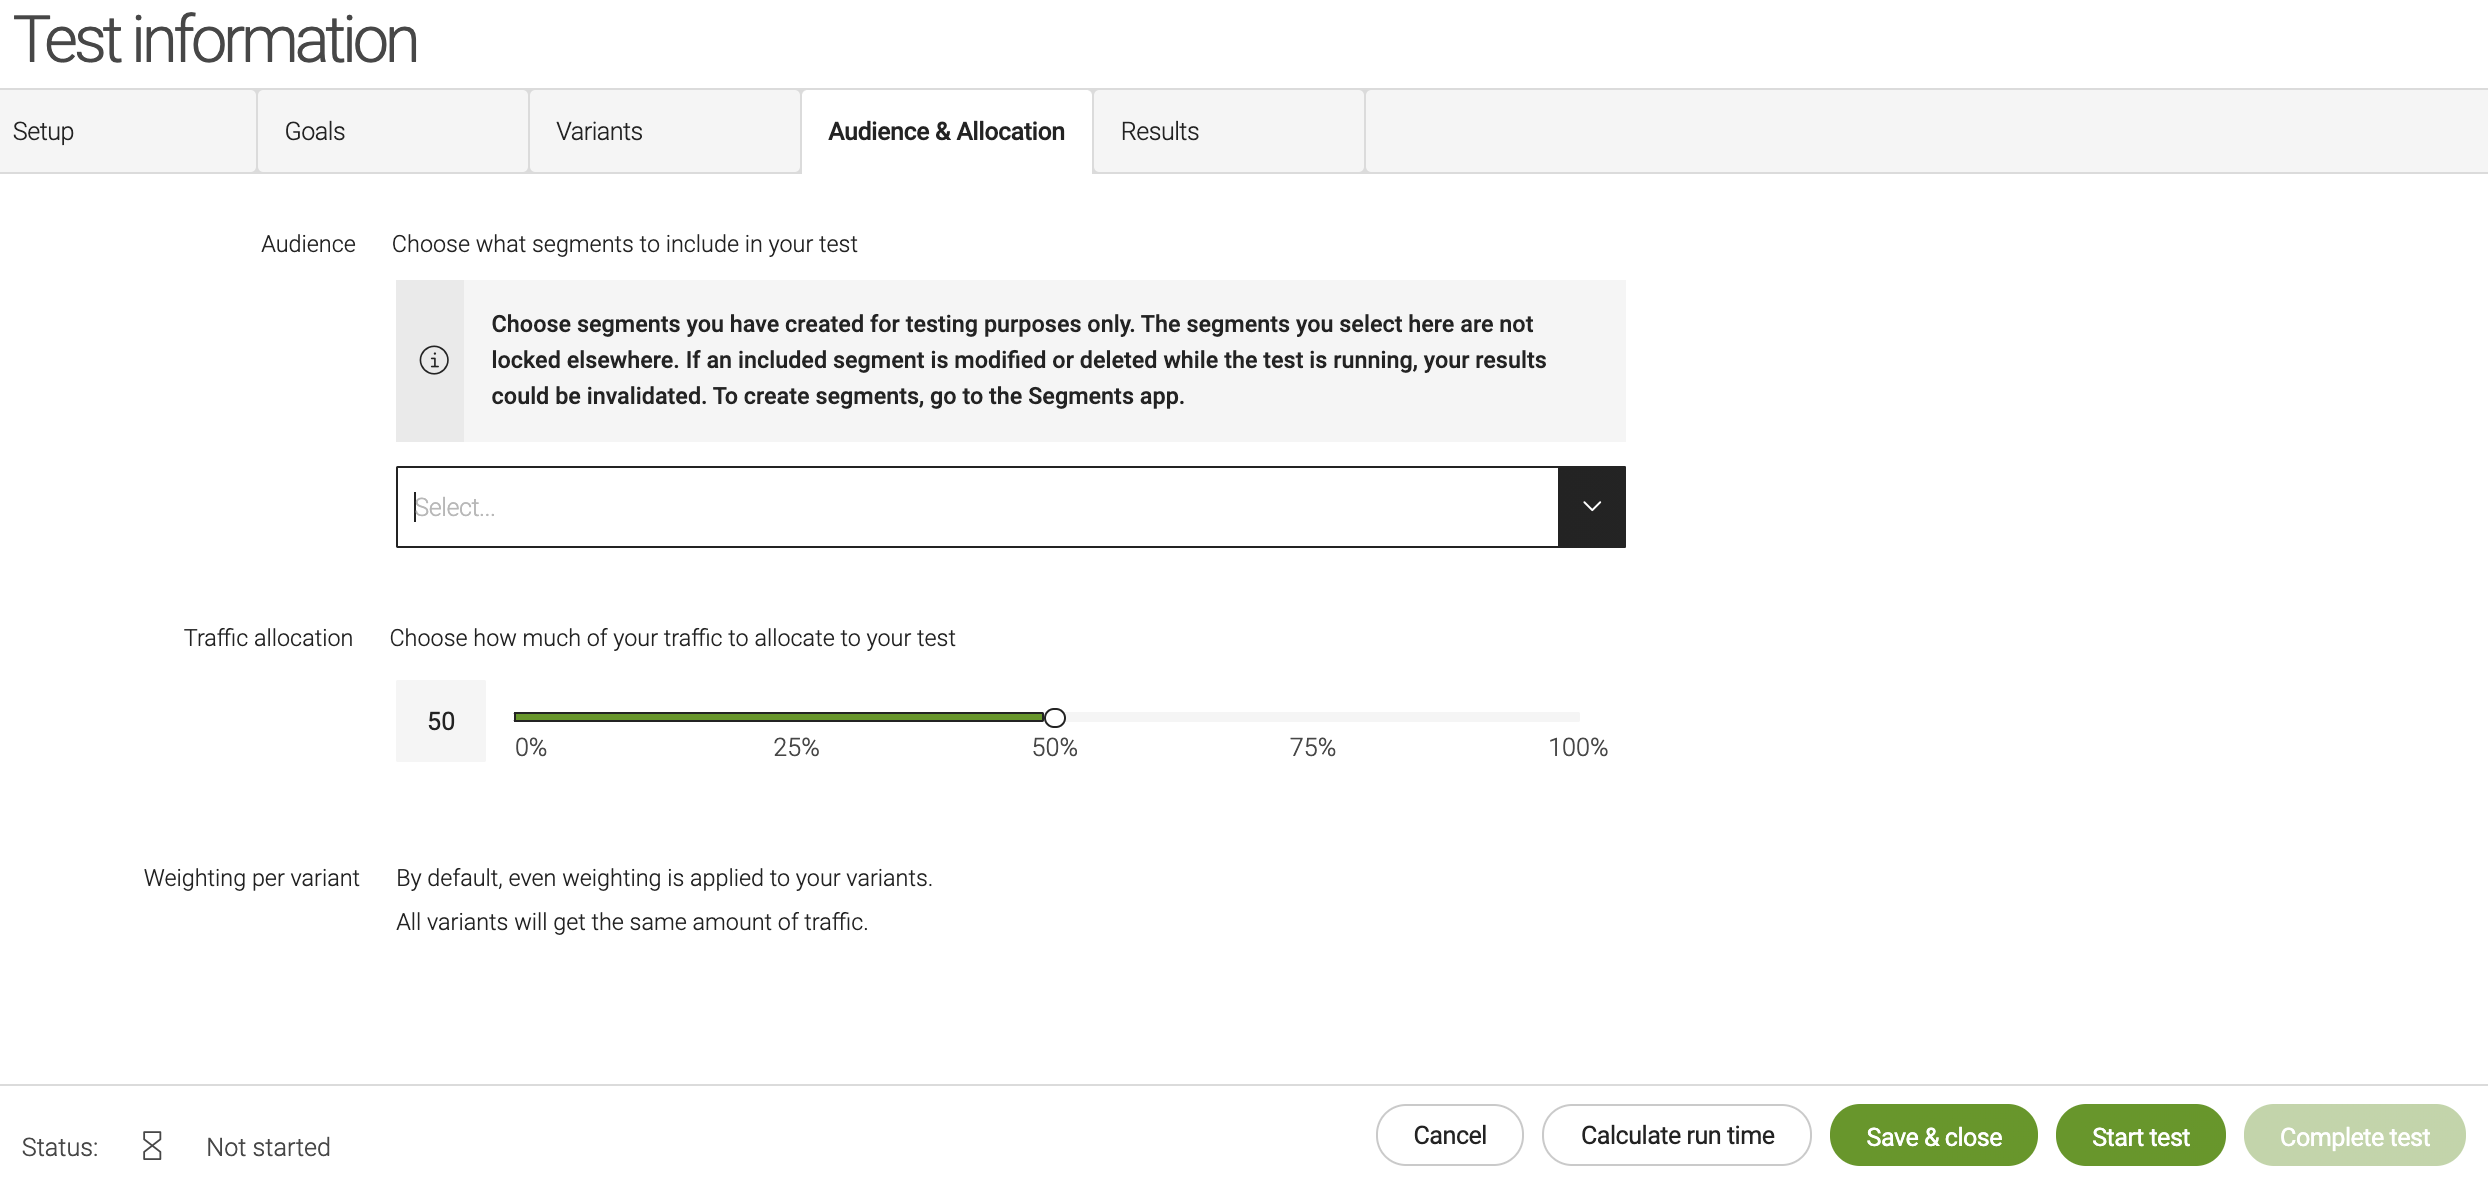
In the Audience & Allocation tab, you select your targeted segments (such as demographics, region, and so on). Select nothing to target your test against all audiences.
You also allocate how much site traffic is dedicated to the variants by moving the slider to your desired traffic percentage.
| Segments are not locked nor copied when used in a test. The effect of deleting or modifying a segment that is actively being used in a test is not defined. We recommend you create dedicated segments for each test. |
Calculating run time
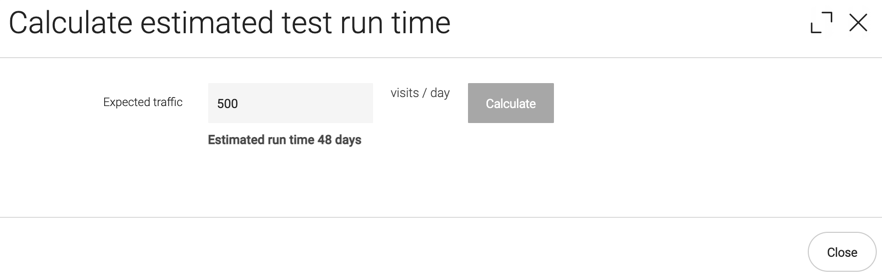
You can calculate the estimated run time (based on estimated site visits) in the A/B/n Testing app. The more traffic your site gets, the faster tests complete.
-
Click Calculate run time at the bottom of the testing page.
-
Enter the estimated site visitors per day.
Typically, you can estimate this based on your site analytics.
-
Click Calculate.
The estimated run time is displayed.
If the estimated run time is unknown, it is because the estimate is outside the configured threshold. This can be configured in the config.yaml file under resources. See the Configuring section on the A/B/n Testing module page for more details.
Starting a test
After you have selected your audience and allocation, start the test with the Start test button.
You can start a test immediately or schedule it to start later.
Once you start a test, you can no longer edit it.
| The scheduled times depend on the time zone set in your user preferences. |
After starting a test, the test runs until you complete it yourself, or until it has reached significant results.

Test status
Once you have finished setting up your test and started running it, you can see its status in the A/B/n Testing app Status column.
| The test status is also displayed in the Pages app A/B/n test status column next to the original page selected. |
| Status | Description | ||
|---|---|---|---|
Not started |
Your test has been created but not started. It may still require some setup. |
||
Running |
Your test is currently running. An estimate of the remaining time is displayed. Once a test is started, you can no longer edit it. |
||
Paused |
You have paused your test. |
||
Aborted |
You have cancelled your test.
|
||
Completed |
You completed your test, either manually or because you reached a significant result. |
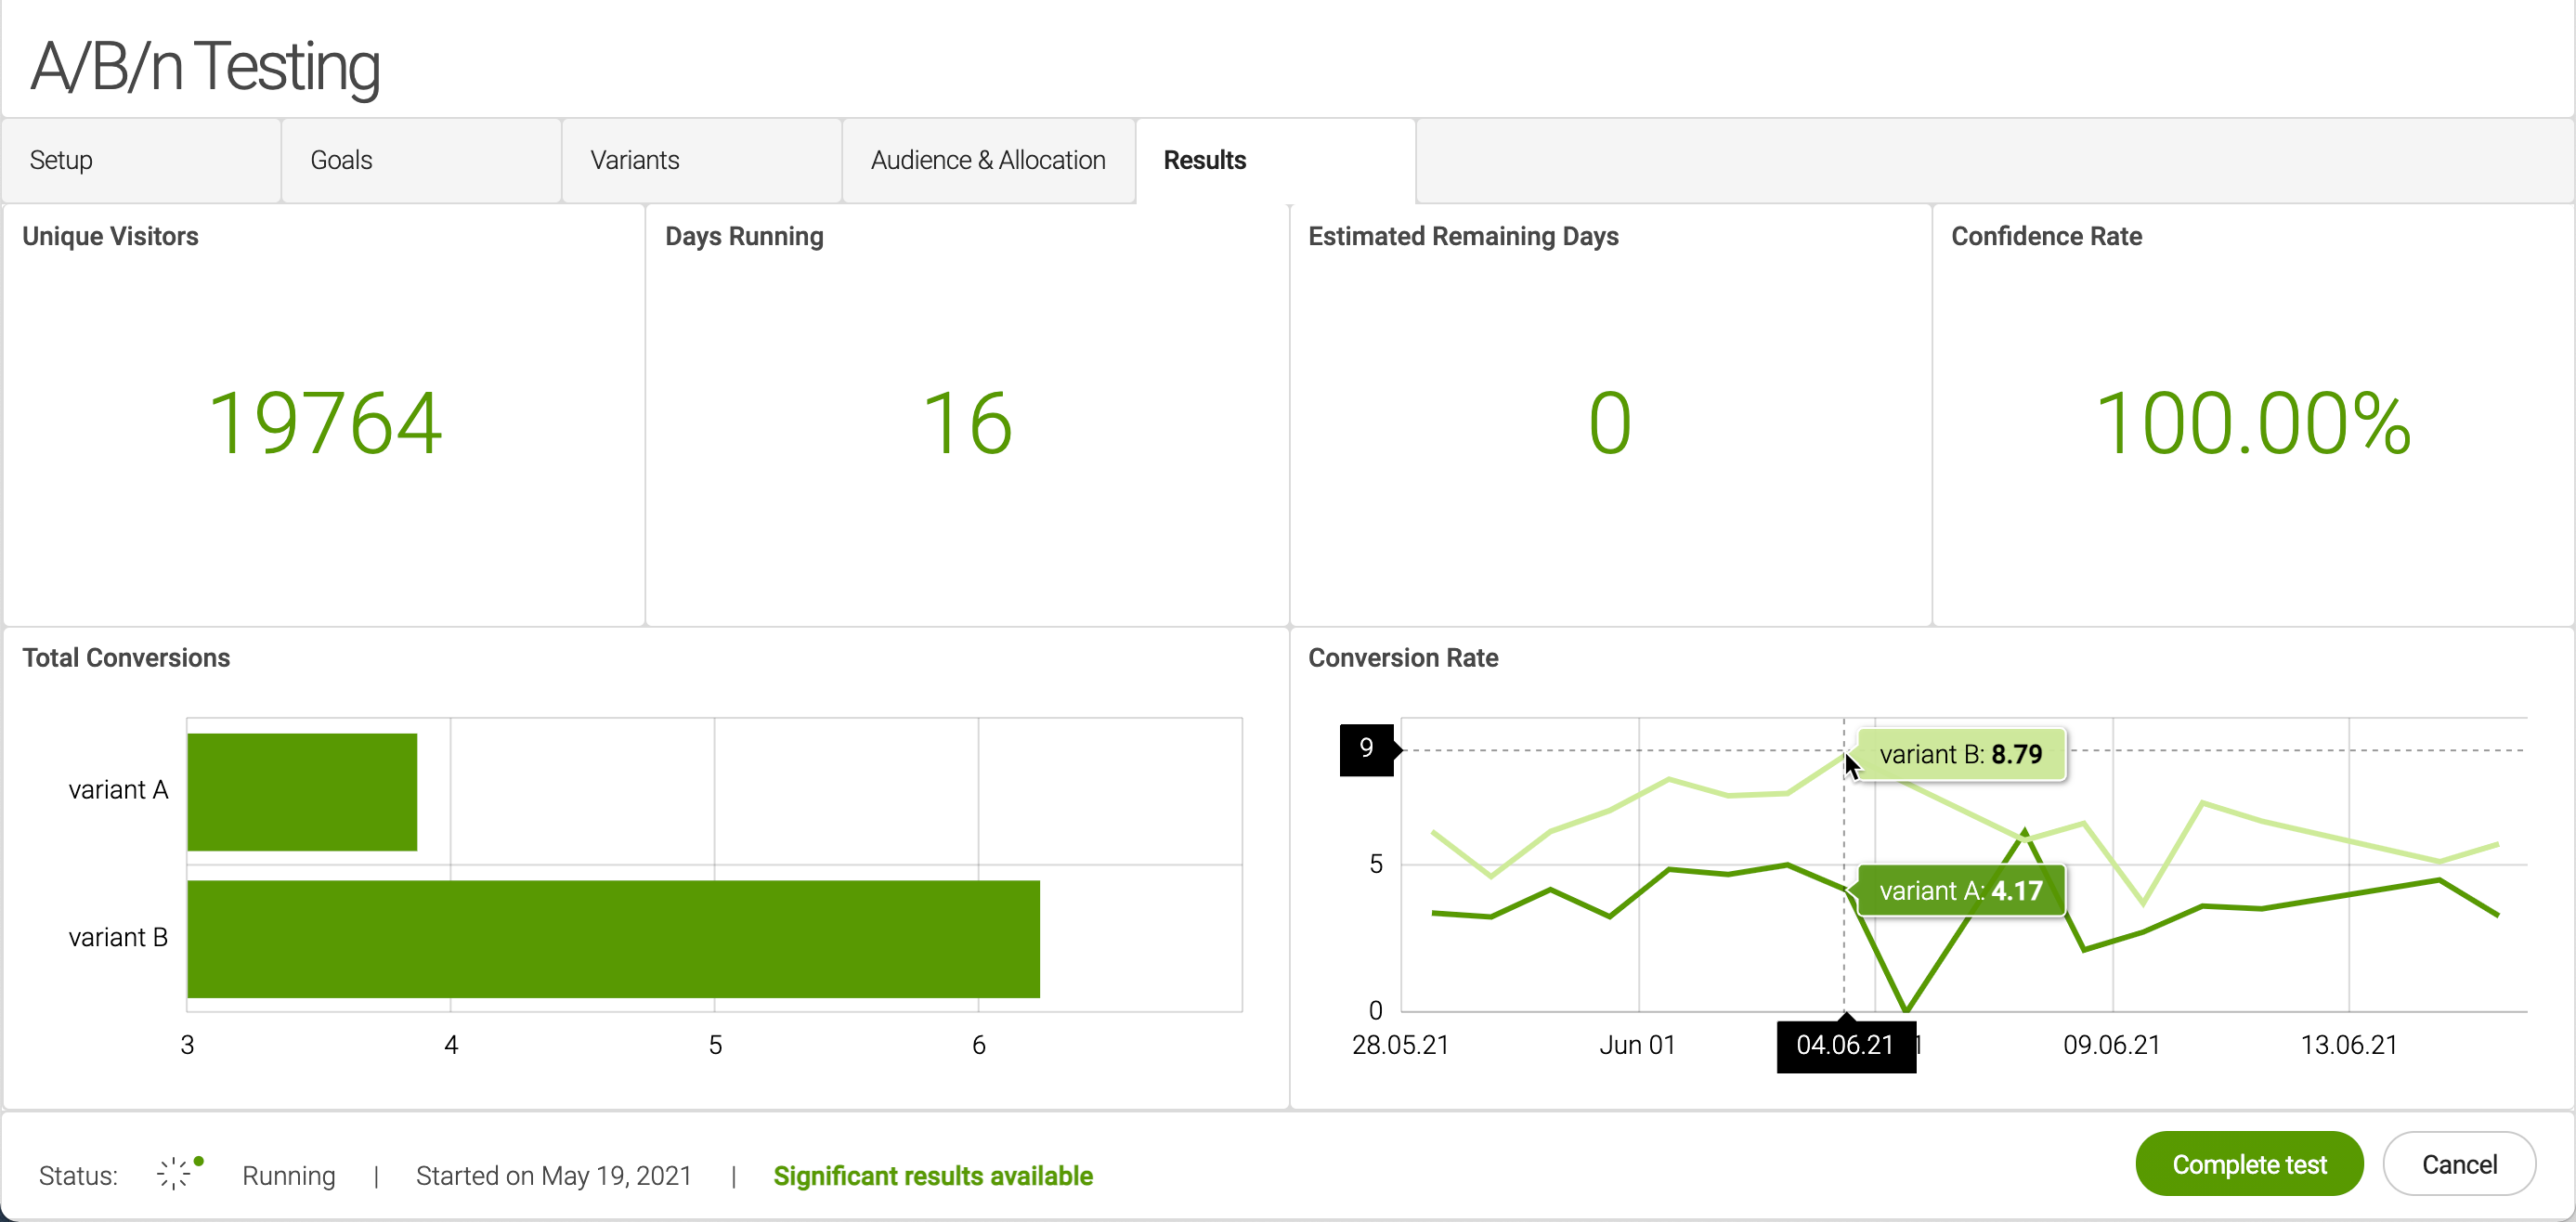
Viewing results and completing tests
You receive results when a significant result has been reached, or when you complete the test manually.
| It may take 24h or more for results to become available, depending on your traffic. |
Significant results
Results are considered significant when at least one of your variants has met the confidence levels based on the base conversion and MDE (minimum detectable effect). This means that, based on preconfigured confidence levels, the variant has a conversion rate that is higher than the base conversion rate by a percentage at least as big as the MDE.
|
What is confidence level? The confidence level is the likelihood that a variant is truly better than the original and that your test results are not due to chance. A confidence level of 90% means that there is a 10% chance of a false positive where the variant is in fact not conclusively better than the original. |
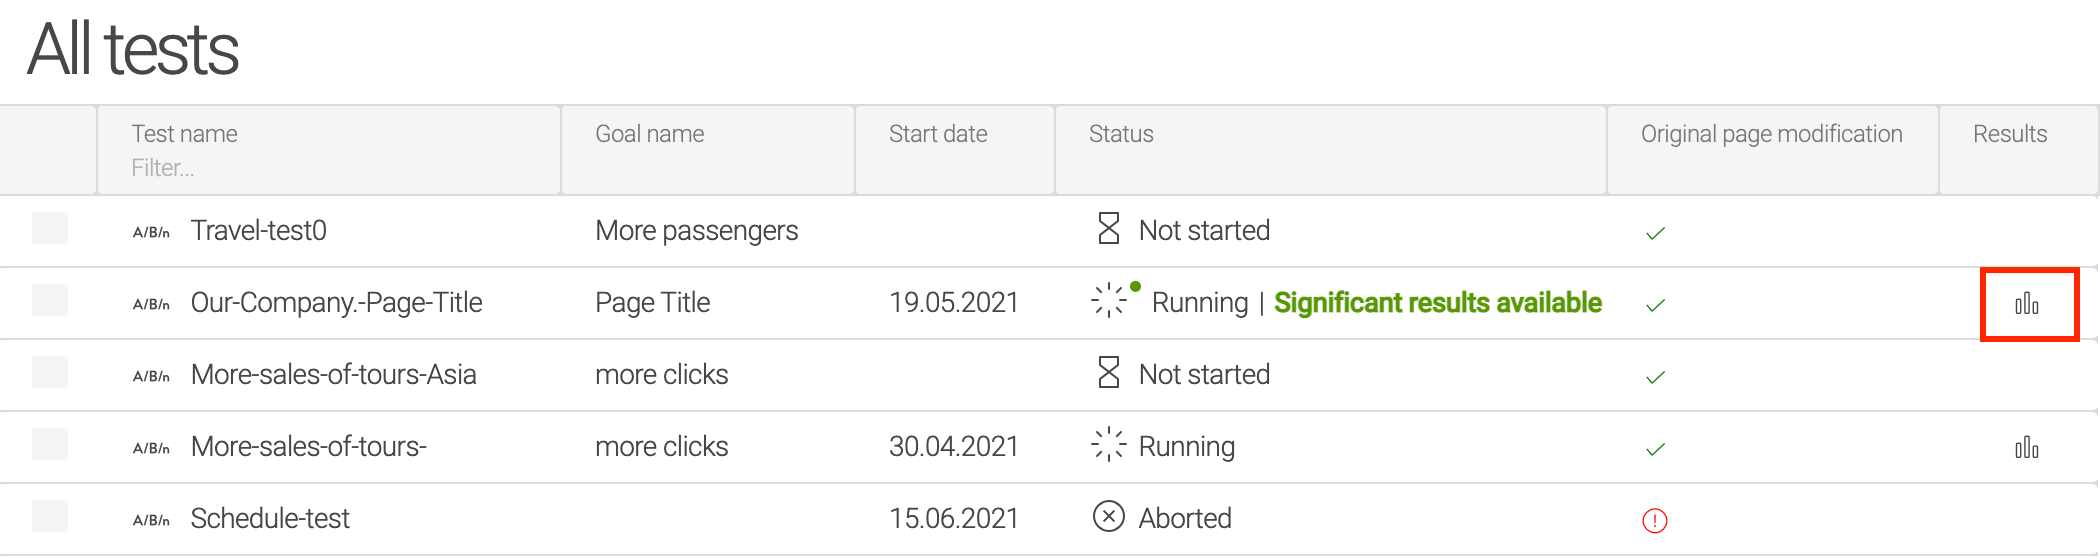
When significant results are reached, a green icon appears next to the Status of the test as well as a message letting you know that significant results have been reached.
To see the results, click the results icon for your test.
Completing the test
-
Open your test.
-
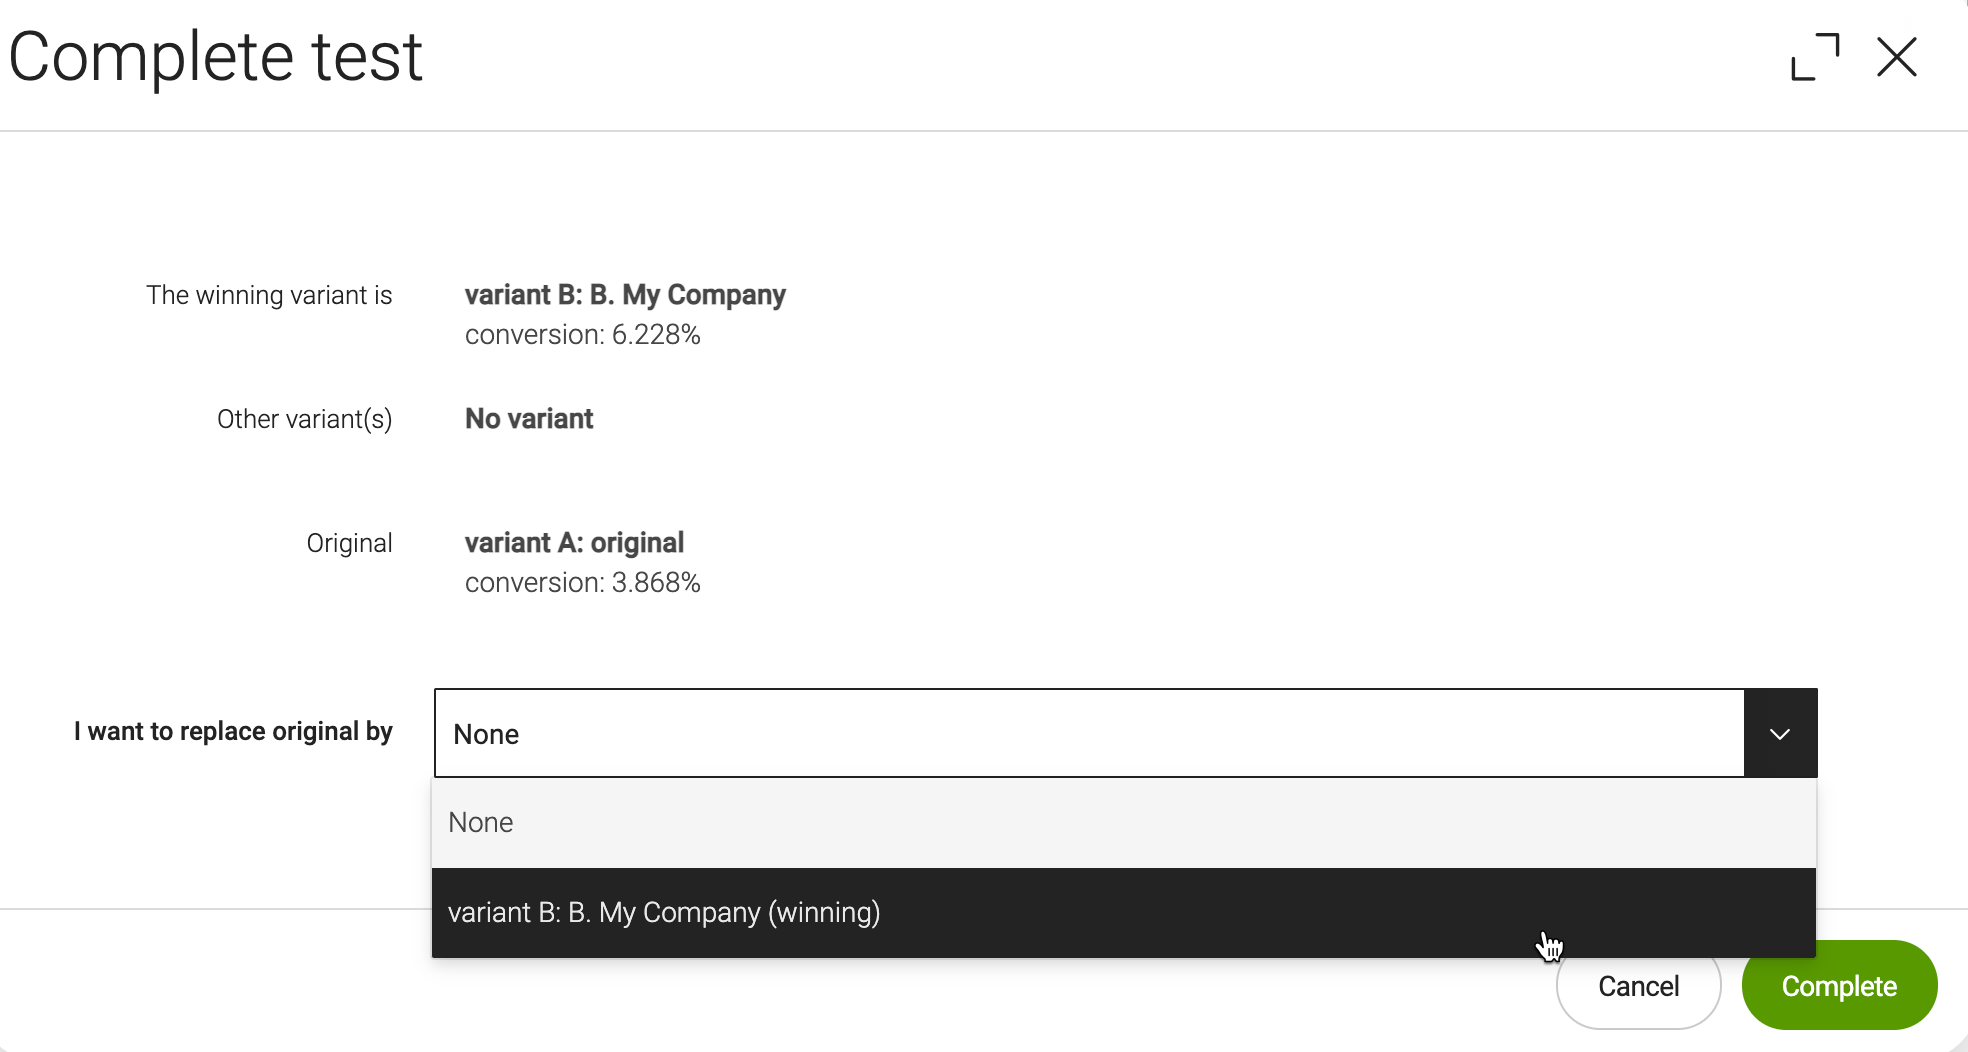
Click Complete test on the bottom ribbon.
-
Select a variant if you want to replace the original.
-
Click Complete.
-
If you have chosen to replace the original with a variant, publish the winning variant.
After completing the test, you cannot preview variants anymore.
If significant results have not been reached based on the configured base conversion, MDE, and confidence level settings, no results will be available.
If the original page selected in the test has been edited while the test was running, a message is displayed in the Complete test dialog.
Replacing the original with a variant
When you choose to replace the original page with a variant, the original is overridden. This has two consequences:
-
If you are using Versioning (enabled by default in Magnolia), you can still access the original page as the previous version even after replacing it. If versioning is not enabled, you can no longer retrieve the overridden page.
-
When you choose a variant, the original (published) page is removed and the winning variant page must be published and approved again.